How to configure Microsoft defender for Endpoint in combination with SmartScreen
The purpose of this blog post is to inform you how to configure Microsoft defender for Endpoint in combination with SmartScreen and Microsoft Defender SmartScreen can be used and managed.
In this blog post, I will explain how to configure Microsoft Defender for Endpoint, so that Microsoft Defender SmartScreen will be enforced. For devices that are only enrolled in Intune, Microsoft Defender SmartScreen must be managed/configured only from the Intune portal. But if you enroll your device in Defender for Endpoint you must also configure some settings in the security portal.
In my previous blogs, I explained how to configure Microsoft Defender SmartScreen and how to whitelist a URL/Domain.
Requirements:
What is Microsoft Defender SmartScreen, why should I configure it?
Microsoft Defender is a Windows built-in security solution that helps your user to be protected against phishing or malware websites and malicious applications and protects your user to download (potentially) malicious files.
Microsoft Defender SmartScreen provides a warning page against e.g., websites that might engage in phishing attacks or attempt to distribute malware through a socially engineered attack.
When Microsoft Defender SmartScreen is configured, you will have the following benefits:
- Anti-phishing and anti-malware support
- Reputation-based URL and app protection
- Fully integrated into Windows 10 and 11
- Management via Microsoft Intune
- Microsoft Defender SmartScreen is constantly learning
- Blocking URLs associated with potentially unwanted applications
Microsoft Defender SmartScreen checks the reputation of any website, application, or web-based app the first time it’s run. Microsoft Defender SmartScreen will check the digital signatures and some other factors against a Microsoft-maintained service. If an app or website has no reputation or is known to be malicious, Microsoft Defender SmartScreen will warn the user or block the app from running entirely.
So, Microsoft Defender SmartScreen is a security layer that needs to be implemented in my opinion to protect your users against the dark part of the internet.
Which security configuration settings should I configure?
Network Protection
This policy allows you to turn on network protection (block/audit) or off. Network protection protects employees using any app from accessing phishing scams, exploit-hosting sites, and malicious content on the Internet. This protection includes preventing third-party browsers from connecting to dangerous sites. For Microsoft Defender SmartScreen, Network Protection must be set to block.
Custom network indicators
The Custom network indicators must be enabled. Custom Network indicators allow or block connections to IP addresses, domains, or URLs in your custom indicator lists for your defender for endpoint enrolled devices.
How to configure Network protection
Note. Network protection can be turned on via multiple configuration profiles e.g., Endpoint protection profile under device configuration or Microsoft Defender Antivirus or Security baseline for Windows 10 and later under Endpoint Security. In this blog post, I have used the endpoint protection profile under device configuration.
- Open Microsoft endpoint manager
- In the menu select Devices
- Under Devices, select Windows and select configuration profiles
Or use the following link Windows – Microsoft Endpoint Manager admin center - Click on + Create Profile Or edit your existing Endpoint Protection policy and skip the next 6 steps.
- Select Windows 10 and later as the platform
- Select Templates as the profile type and select Endpoint Protection
- Click on Create
- Provide a policy name, e.g., EndpointCave-PRD-W10-EndpointProtection
- Set a description, so that everyone with access to the portal knows the purpose
- Click on Next
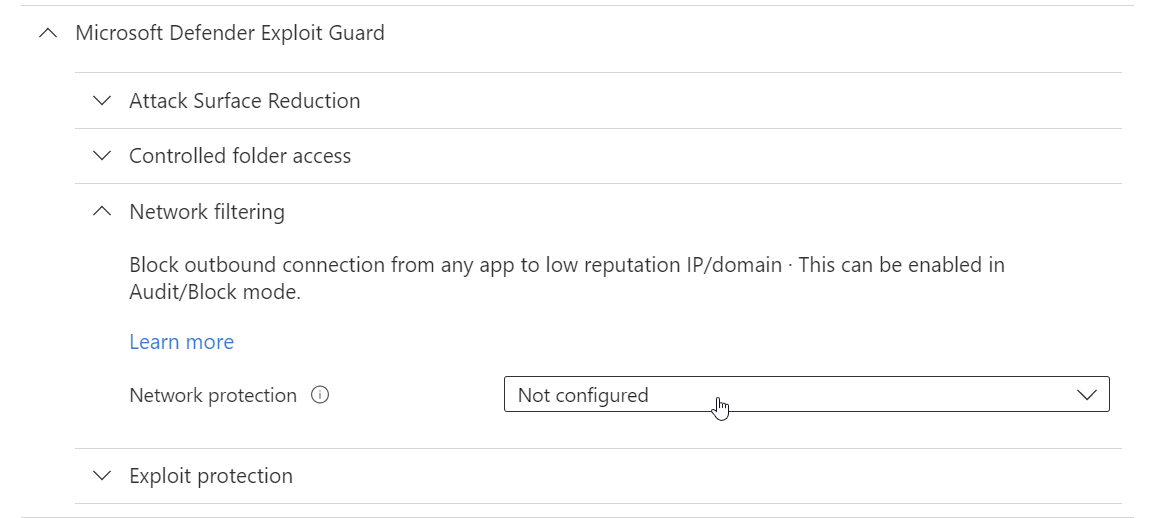
- Click on Microsoft Defender Exploit Guard
- And click on Network filtering under Microsoft Defender Exploit Guard
- Enable Network protection
- Click on Review + save at the bottom of the page
- Check the changed configuration and click on Save
How to enable custom network indicators
- Open https://security.microsoft.com
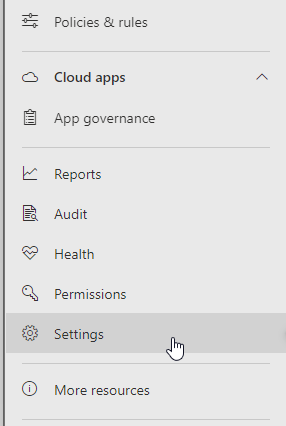
- In the left menu, scroll down and click on settings
- Click now on Endpoints in the menu
- In the 2nd menu (submenu), Click on Advanced features under General
- Scroll down to Custom network Indicators
- Enable Custom network indicators
- At the bottom of the page click on Save preferences


 Hi! My name is René Laas. I have passion and enthusiasm for the Microsoft 365 Cloud. I am based in the Netherlands.

Leave a Reply
Want to join the discussion?Feel free to contribute!