Configure Defender SmartScreen via Settings catalog with Intune
The purpose of this blog post is to inform you how to configure Microsoft Defender SmartScreen in Windows and Microsoft Edge via the Settings catalog option with Microsoft Intune.
In this blog post, I use the Settings catalog option, it is possible to configure SmartScreen via several methods. For example Endpoint Protection, Administrative Templates, or Microsoft Security baselines. The security baseline is in my point of view not an option because it does not have all the configuration settings available. I wanted to have all the configuration of a feature in one profile instead of multiple configuration profiles and a change to get conflicts.
For the other methods (Endpoint Protection and Administrative Templates), it is more a personal preference. I do like to use the Settings catalog because of the duplicate function and some functionalities in the Graph API. Do you prefer the Endpoint protection or Administrative template profiles? Please check out the following blog: How to configure Microsoft Defender SmartScreen via Microsoft Intune?
Requirements:
What is Microsoft Defender SmartScreen, why should I configure it?
Microsoft Defender is a Windows built-in security solution that helps your user to be protected against phishing or malware websites and malicious applications and protects your user to download (potentially) malicious files.
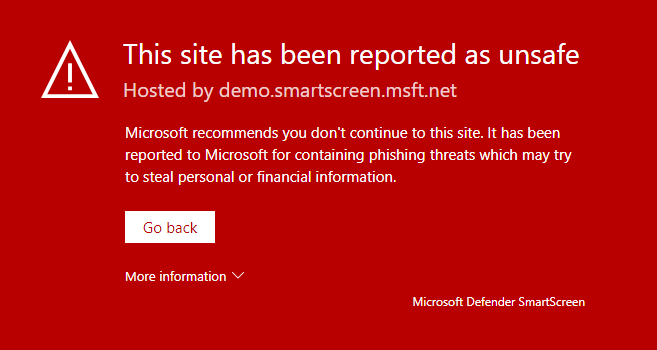
Microsoft Defender SmartScreen provides a warning page against e.g., websites that might engage in phishing attacks or attempt to distribute malware through a socially engineered attack.
When Microsoft Defender SmartScreen is configured, you will have the following benefits:
- Anti-phishing and anti-malware support
- Reputation-based URL and app protection
- Fully integrated into Windows 10 and 11
- Management via Microsoft Intune
- Microsoft Defender SmartScreen is constantly learning
- Blocking URLs associated with potentially unwanted applications
Microsoft Defender SmartScreen checks the reputation of any website, application, or web-based app the first time it’s run. Microsoft Defender SmartScreen will check the digital signatures and some other factors against a Microsoft-maintained service. If an app or website has no reputation or is known to be malicious, Microsoft Defender SmartScreen will warn the user or block the app from running entirely.
So, Microsoft Defender SmartScreen is a security layer that needs to be implemented in my opinion to protect your users against the dark part of the internet.
What configuration setting are available?
Administrative Templates – Internet Explorer *
Note.
Internet Explorer (IE) 11 desktop application ended support for certain operating systems on June 15, 2022. Customers are encouraged to move to Microsoft Edge with IE mode.
Prevent bypassing SmartScreen Filter warnings
Prevent bypassing SmartScreen Filter warnings about files that are not commonly downloaded from the Internet
This policy setting determines whether the user can bypass warnings from SmartScreen Filter. SmartScreen Filter warns the user about executable files that Internet Explorer users do not commonly download from the Internet. If you enable this policy setting, SmartScreen Filter warnings block the user. If you disable or do not configure this policy setting, the user can bypass SmartScreen Filter warnings.
Prevent managing SmartScreen Filter
This policy setting prevents the user from managing SmartScreen Filter, which warns the user if the website being visited is known for fraudulent attempts to gather personal information through “phishing,” or is known to host malware. If you enable this policy setting, the user is not prompted to turn on SmartScreen Filter. All website addresses that are not on the filter’s allow list are sent automatically to Microsoft without prompting the user. If you disable or do not configure this policy setting, the user is prompted to decide whether to turn on SmartScreen Filter during the first-run experience.
Administrative Templates – File Explorer
Configure Windows Defender SmartScreen
This policy allows you to turn Windows Defender SmartScreen on or off. SmartScreen helps protect PCs by warning users before running potentially malicious programs downloaded from the Internet. This warning is presented as an interstitial dialog shown before running an app that has been downloaded from the Internet and is unrecognized or known to be malicious. No dialog is shown for apps that do not appear to be suspicious. Some information is sent to Microsoft about files and programs run on PCs with this feature enabled.
Browser *
Note.
These settings are for the previous version of Microsoft Edge (version 45 and earlier) and are deprecated. These settings will be removed in a future Windows release. Microsoft recommends updating your version of Microsoft Edge to version 77 or later and use the ADMX Ingestion function for management. Learn more about how to Configure Microsoft Edge using Mobile Device Management.
Allow Smart Screen
This setting lets you decide whether to turn on Windows Defender SmartScreen.
Prevent Smart Screen Prompt Override
This setting lets you decide whether to turn on Windows Defender SmartScreen.
Prevent Smart Screen Prompt Override For Files
Don’t allow Windows Defender SmartScreen warning overrides for unverified files.
Microsoft Edge
Configure Microsoft Defender SmartScreen
This policy setting lets you configure whether to turn on Microsoft Defender SmartScreen. Microsoft Defender SmartScreen provides warning messages to help protect your users from potential phishing scams and malicious software. By default, Microsoft Defender SmartScreen is turned on. If you enable this setting, Microsoft Defender SmartScreen is turned on. If you disable this setting, Microsoft Defender SmartScreen is turned off. If you don’t configure this setting, users can choose whether to use Microsoft Defender SmartScreen. This policy is available only on Windows instances that are joined to a Microsoft Active Directory domain; or on Windows 10 Pro or Enterprise instances that are enrolled for device management.
Configure Microsoft Defender SmartScreen to block potentially unwanted apps
This policy setting lets you configure whether to turn on blocking for potentially unwanted apps with Microsoft Defender SmartScreen. Potentially unwanted app blocking with Microsoft Defender SmartScreen provides warning messages to help protect users from adware, coin miners, bundleware, and other low-reputation apps that are hosted by websites. Potentially unwanted app blocking with Microsoft Defender SmartScreen is turned off by default. If you enable this setting, potentially unwanted app blocking with Microsoft Defender SmartScreen is turned on. If you disable this setting, potentially unwanted app blocking with Microsoft Defender SmartScreen is turned off. If you don’t configure this setting, users can choose whether to use potentially unwanted app blocking with Microsoft Defender SmartScreen. This policy is available only on Windows instances that are joined to a Microsoft Active Directory domain; or on Windows 10 Pro or Enterprise instances that are enrolled for device management.
Enable Microsoft Defender SmartScreen DNS requests
This policy lets you configure whether to enable DNS requests made by Microsoft Defender SmartScreen. Note: Disabling DNS requests will prevent Microsoft Defender SmartScreen from getting IP addresses, and potentially impact the IP-based protections provided. If you enable or don’t configure this setting, Microsoft Defender SmartScreen will make DNS requests. If you disable this setting, Microsoft Defender SmartScreen will not make any DNS requests. This policy is available only on Windows instances that are joined to a Microsoft Active Directory domain, Windows 10 Pro or Enterprise instances that enrolled for device management, or macOS instances that are that are managed via MDM or joined to a domain via MCX.
Enable new SmartScreen library
Allows the Microsoft Edge browser to load new SmartScreen library (libSmartScreenN) for any SmartScreen checks on site URLs or application downloads. If you enable this policy, Microsoft Edge will use SmartScreen implementation from new library (libSmartScreenN). If you disable or don’t configure this policy, Microsoft Edge will continue using the SmartScreen implementation from old library (libSmartScreen). This policy is available only on Windows instances that are joined to a Microsoft Active Directory domain, Windows 10 Pro or Enterprise instances that enrolled for device management, or macOS instances that are that are managed via MDM or joined to a domain via MCX. This temporary policy was created to support the update of a new SmartScreen client. This policy will be deprecated and removed along with the legacy client.
Force Microsoft Defender SmartScreen checks on downloads from trusted sources
This policy setting lets you configure whether Microsoft Defender SmartScreen checks download reputation from a trusted source. If you enable or don’t configure this setting, Microsoft Defender SmartScreen checks the download’s reputation regardless of source. If you disable this setting, Microsoft Defender SmartScreen doesn’t check the download’s reputation when downloading from a trusted source. This policy is available only on Windows instances that are joined to a Microsoft Active Directory domain; or on Windows 10 Pro or Enterprise instances that are enrolled for device management.
Prevent bypassing Microsoft Defender SmartScreen prompts for sites
This policy setting lets you decide whether users can override the Microsoft Defender SmartScreen warnings about potentially malicious websites. If you enable this setting, users can’t ignore Microsoft Defender SmartScreen warnings and they are blocked from continuing to the site. If you disable or don’t configure this setting, users can ignore Microsoft Defender SmartScreen warnings and continue to the site. This policy is available only on Windows instances that are joined to a Microsoft Active Directory domain; or on Windows 10 Pro or Enterprise instances that are enrolled for device management.
Prevent bypassing of Microsoft Defender SmartScreen warnings about downloads
This policy lets you determine whether users can override Microsoft Defender SmartScreen warnings about unverified downloads. If you enable this policy, users in your organization can’t ignore Microsoft Defender SmartScreen warnings, and they’re prevented from completing the unverified downloads. If you disable or don’t configure this policy, users can ignore Microsoft Defender SmartScreen warnings and complete unverified downloads. This policy is available only on Windows instances that are joined to a Microsoft Active Directory domain; or on Windows 10 Pro or Enterprise instances that are enrolled for device management.
Smart Screen
Enable App Install Control
This policy setting is intended to prevent malicious content from affecting your user’s devices when downloading executable content from the internet.
Enable Smart Screen In Shell
Allows IT Admins to configure SmartScreen for Windows.
Prevent Override For Files In Shell
Allows IT Admins to control whether users can ignore SmartScreen warnings and run malicious file.
Smart Screen – Enhanced Phishing Protection
One of the features of Windows 11 and SmartScreen is Enhanced Phishing protection. Those settings need to be configured as well. Check out this blog post that goes about the technical part of protecting your users against phishing with SmartScreen.
Which configuration setting should I configure?
Which setting should I configure? This is an excellent question. My only answer to this question is, that it depends on what applies to your organization. Are you still using Internet Explorer? Configure SmartScreen for Internet Explorer as well.
Remember that you can allow specific websites and files in the M365 Defender portal via indicators. With that in mind, configure the SmartScreen as securely as possible and allow files, IP addresses, URLs/Domains, and certificates if needed.
Note.
The below settings are based on an environment with Windows 11 with the latest update and no Internet explorer or legacy browser
Administrative Templates – File Explorer
| Setting | Value |
|---|---|
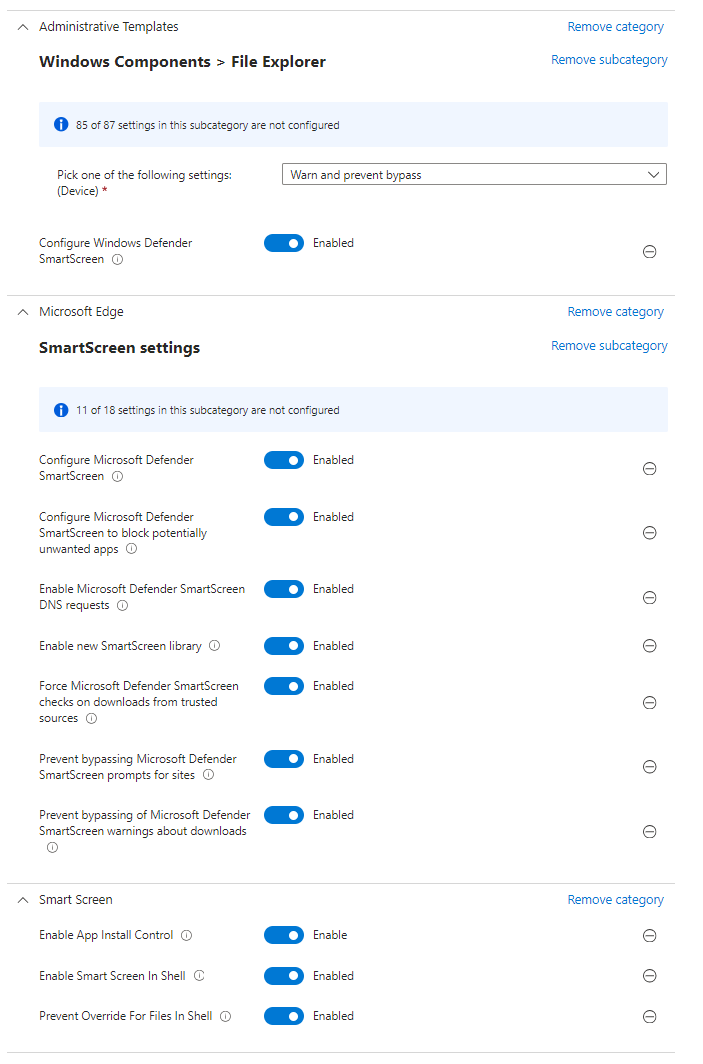
| Configure Windows Defender SmartScreen | Enabled – Warn and prevent bypass |
Microsoft Edge
| Setting | Value |
|---|---|
| Configure Microsoft Defender SmartScreen | Enabled |
| Configure Microsoft Defender SmartScreen to block potentially unwanted apps | Enabled |
| Enable Microsoft Defender SmartScreen DNS requests | Enabled |
| Enable new SmartScreen library | Enabled |
| Force Microsoft Defender SmartScreen checks on downloads from trusted sources | Enabled |
| Prevent bypassing Microsoft Defender SmartScreen prompts for sites | Enabled |
| Prevent bypassing of Microsoft Defender SmartScreen warnings about downloads | Enabled |
Smart Screen
| Setting | Value |
|---|---|
| Enable App Install Control | Enable |
| Enable Smart Screen In Shell | Enabled |
| Prevent Override For Files In Shell | Enabled |
Smart Screen – Enhanced Phishing Protection
One of the features of Windows 11 and SmartScreen is Enhanced Phishing protection. Those settings need to be configured as well. Check out this blog post that goes about the technical part of protecting your users against phishing with SmartScreen.
How to configure SmartScreen via Settings catalog
- Open Microsoft Intune
- In the menu select Devices
- Under Devices, select Windows and select configuration profiles
Or use the following link Create a profile – Microsoft Intune admin center - Click on + Create Profile
- Select Windows 10 and later as the platform.
- Select Settings catalog as the profile type.
- Click on Create
- Provide a policy name, e.g., EndpointCave-PRD-Win-SmartScreen.
- Set a description, so that everyone with access to the portal knows the purpose.
- Click on Next
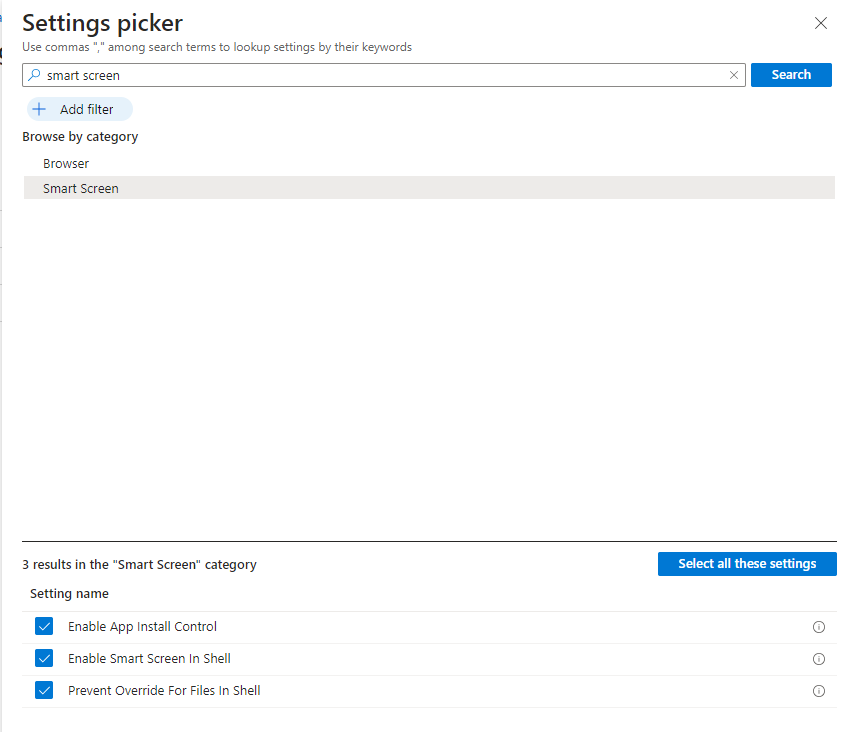
- Click on + Add settings, and search for the SmartScreen settings (see above tables).
- Check all the checkboxes for settings that you want to configure.
- Close the Settings Picker
- Enable and configure all the SmartScreen settings.
- Click on the Next button at the bottom of the page.
- Set a Scope tag if needed and click on Next.
- Assign the SmartScreen policy to the correct group, configure a filter if needed, and click on Next.
- Review your configuration at the Review + create page and click on Create
Test your Microsoft Defender SmartScreen configuration
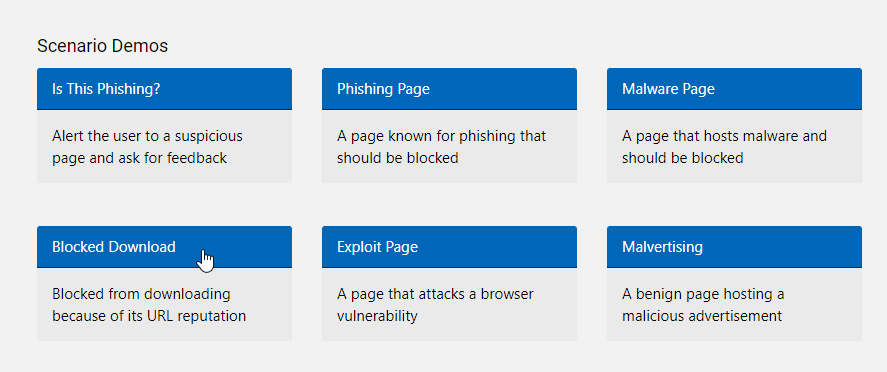
If you want to validate if SmartScreen is working correctly, you can use Defender testground via UrlRep – Microsoft Defender Testground and AppRep – Microsoft Defender Testground. Select one of the scenarios and test your configuration.


 Hi! My name is René Laas. I have passion and enthusiasm for the Microsoft 365 Cloud. I am based in the Netherlands.
 Andrea De Santis
 Rami Al-zayat
Good post!
We have some issues where we haven’t configured Smartscreen (yet) but have deployed Microsoft Defender. We’ve whitelisted some urls which are blocked by smartscreen (which we suppose are blocked via Defender, not sure) but the whitelisting does not make the sites available.
Any experience with this? Microsoft could document these features a bit better….
Hi Robby,
First of all, thank you. How did you set the whitelisting? Are your devices enrolled with Defender for Endpoint?
Did you already read this blog post?
https://endpointcave.com/how-to-whitelist-a-url-domain-in-microsoft-defender-smartscreen/
Kind regards,
Rene