Get notified of a Conditional Access Policy change
The purpose of this blog post is to inform you how to get notified via Adaptive Cards in Microsoft Teams on a Conditional Access Policy change.
Changes in the Conditional Access Policies can have a big impact and Conditional Access is responsible for granting and blocking access to cloud resources. By default, there is no option to get notified of CA policy changes. So, I decided to dig into the Audit logs and Graph API to get notifications, so you don’t have to log on to the Azure AD portal and check manually the log files. Also, you can inform the users without admin accounts like managers or a change manager so he/she can check if the change is registered and approved to execute.
In this blog post, I use an Azure Logic App to receive the notifications in Teams, but this solution can also be built via a Power Automate Flow.
Requirements:
Graph API requirements:
What is Conditional Access?
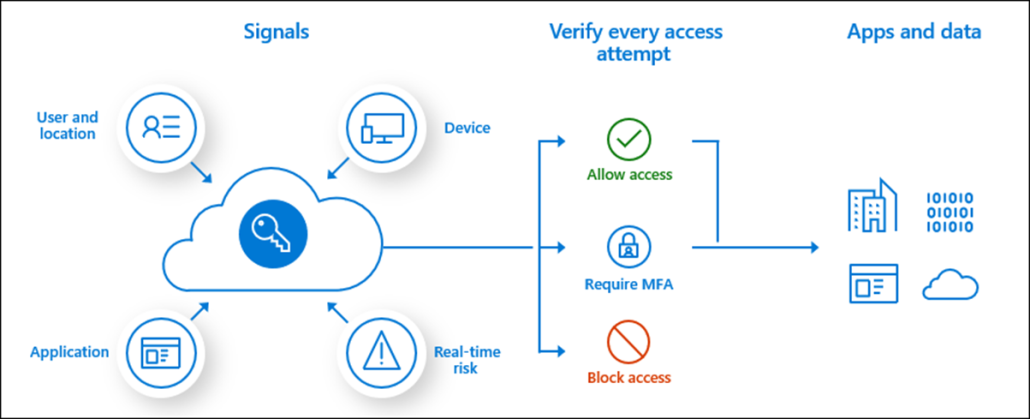
Conditional Access brings signals together, to make decisions, and enforce organizational policies. Azure AD Conditional Access is at the heart of the new identity-driven control plane. Conditional Access policies at their simplest are if-then statements
More information about Conditional Access can be found here
What is an Azure Logic App?
Azure Logic Apps is a cloud service that helps you schedule, automate, and orchestrate tasks, business processes, and workflows when you need to integrate apps, data, systems, and services across enterprises or organizations.
More information about Azure Logic Apps can be found here
What are Adaptive Cards?
Adaptive Cards are platform-agnostic snippets of UI, authored in JSON, that apps and services can openly exchange. When delivered to a specific app, the JSON is transformed into a native UI that automatically adapts to its surroundings. It helps design and integrate lightweight UI for all major platforms and frameworks.
More information about Adaptive cards can be found here
Create an App Registration in Azure AD
- Open azure.com
- Click on Azure Active Directory
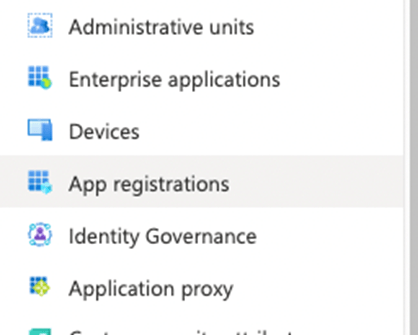
- Click on App Registrationin the left menu
Or use the following link Active Directory | App Registration
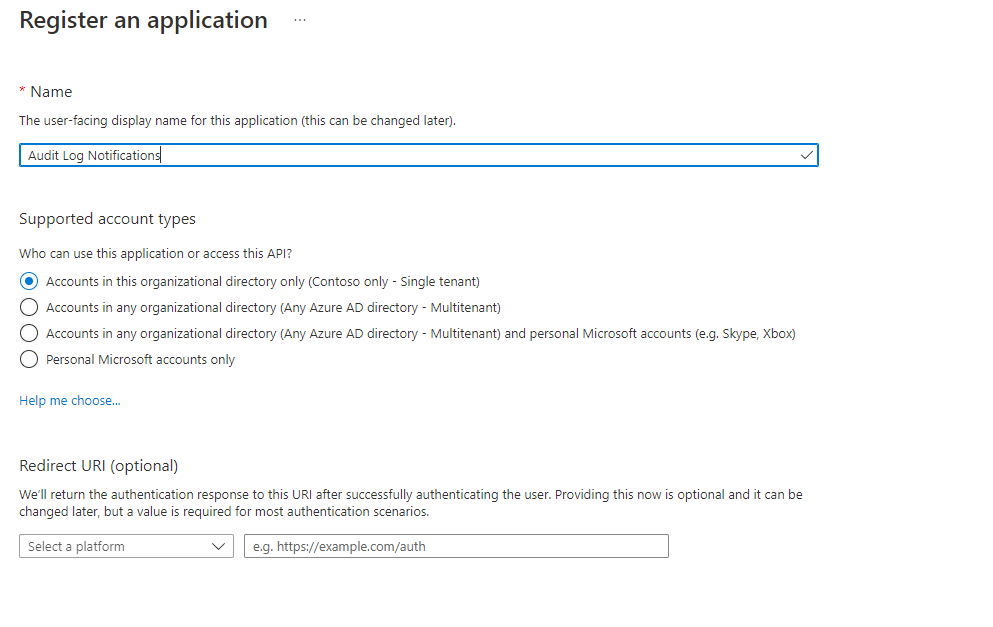
- Click on + New registration
- Configure an app name e.g., Audit Log Notifications
- Click on the Register button, the app will be created and automatically opened.
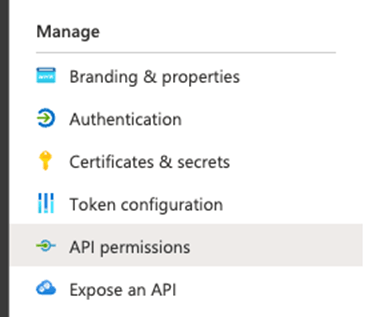
- In the menu click on API Permissions
- Click on+ Add a permission
- Select Microsoft Graph and select Application permissions
- Search and add the following permissions
AuditLog.Read.All
Directory.Read.All- Grant admin consent for your organization
- In the menu click on Certificates & Secrets
- Click on + New Client secret
- Set a description and the expiry of the secret and click on Add
- Copy the value of the secret, the secret is needed for the flow.
- Go to the overview page and copy the Client ID and Tenant ID, those are also needed in the flow.
Create a Teams Channel Webhook
- Open Microsoft Teams
- Click on Teams in the menu and select the correct team
- Click on the 3 bullets behind a Teams channel
- In the menu click on Connectors
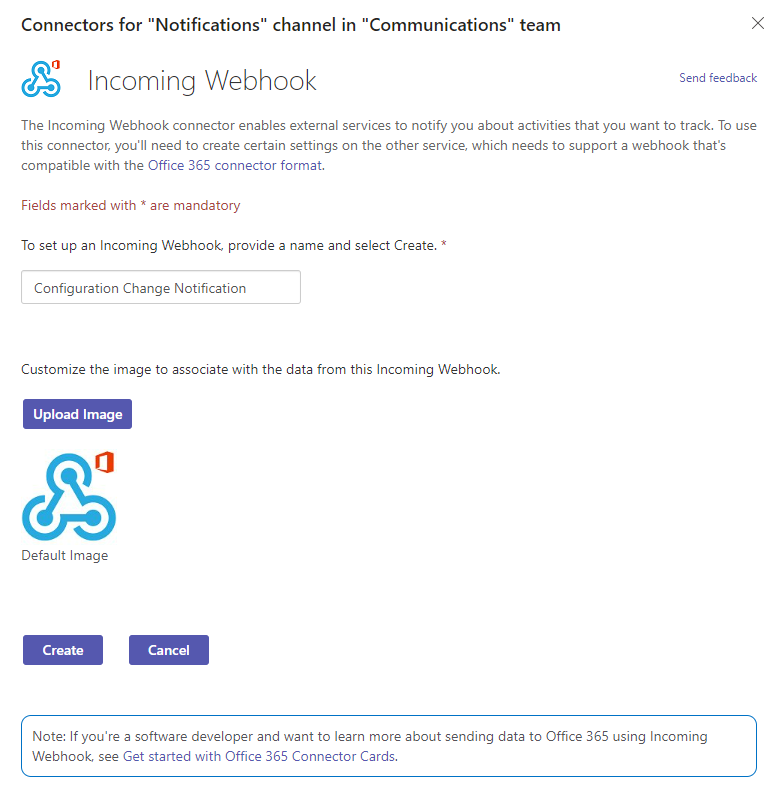
- The connectors screen will pop up and search for “Incoming Webhook” and select Configure
- The connector will be added to the channel, but first, we must provide a name.
Note. This name will be displayed for every notification.
- Upload another logo if needed.
- Click on create
- A Webhook URL will automatically be created, copy this URL because it is needed in the flow.
- Click on Done
Create an Azure Logic App for the Conditional Access changes notifications
Note. Rename every Azure Logic App action to match the screenshots!
- Open portal.azure.com
- Search for Logic App
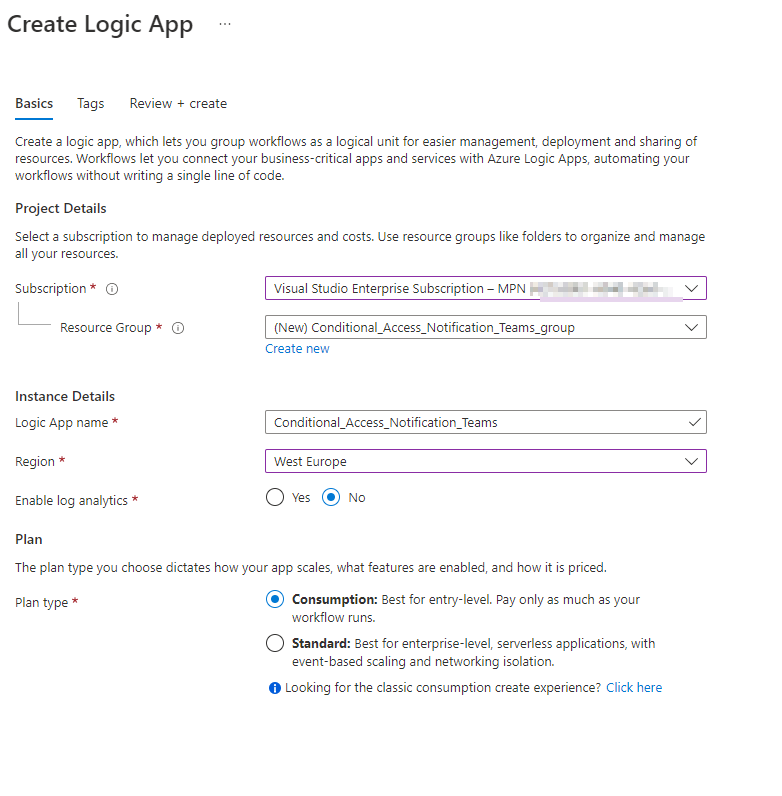
- Click on + Add
- Select an existing Resource Group or create a new Resource Group
- Select the instance Type (I have chosen for Consumption, but check the Azure Calculator which option fits your environment)
- Select your region and click on Review + Create
- Check the details on the Review + Create page and click on Create
- After the deployment is completed, go to your new Logic App via Go to Resource button
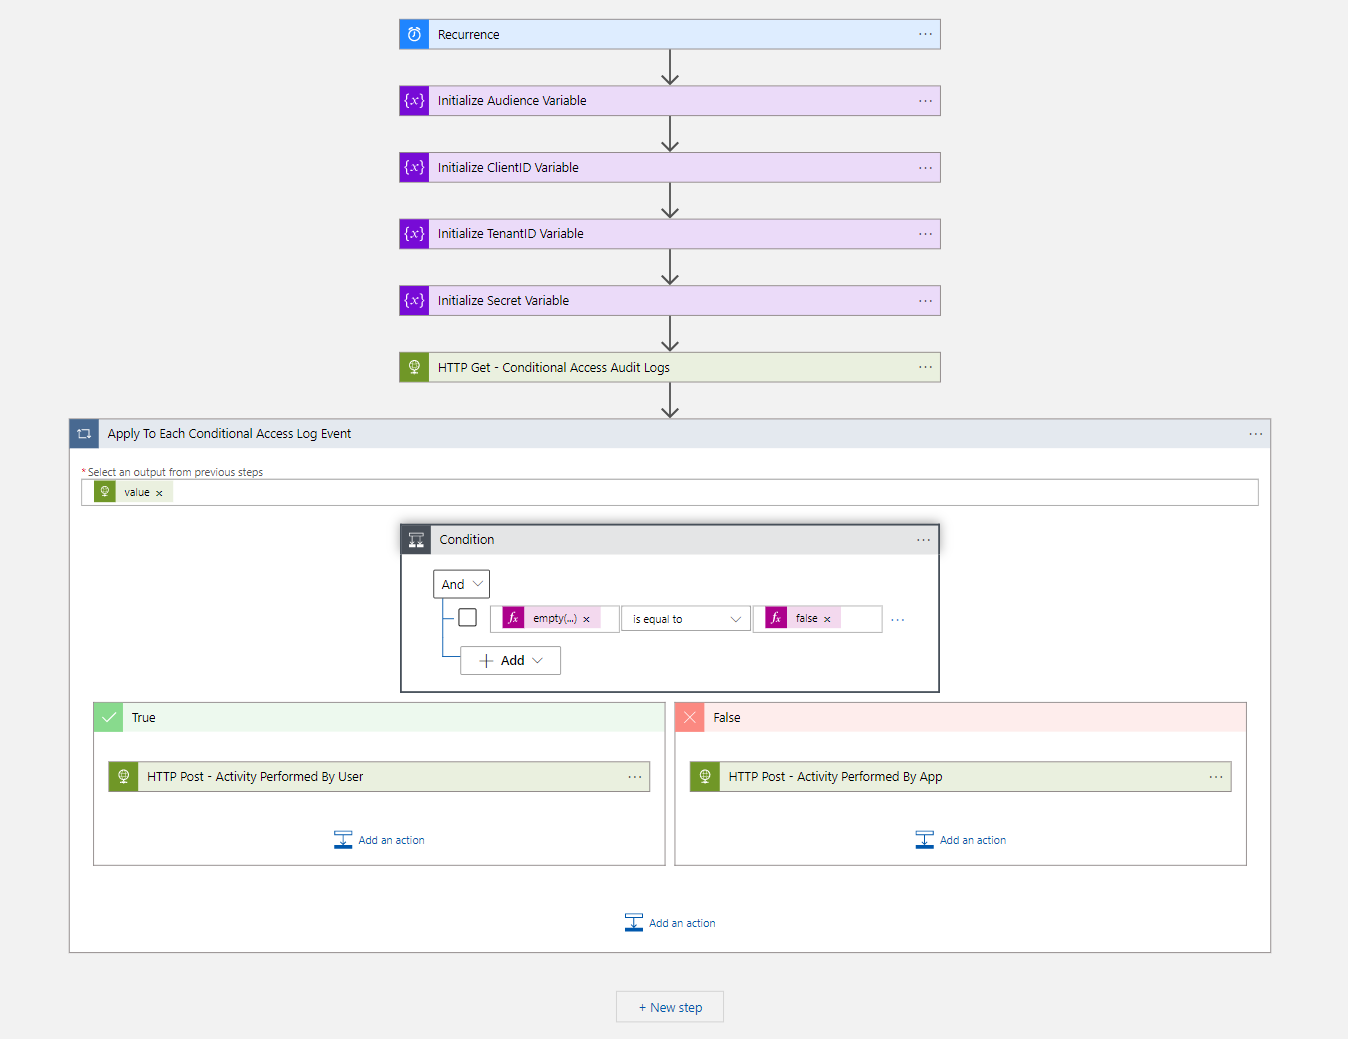
- The first step of the workflow is the Recurrence trigger, based on the desired interval
Note. I have used a 5-minute interval in this blog.
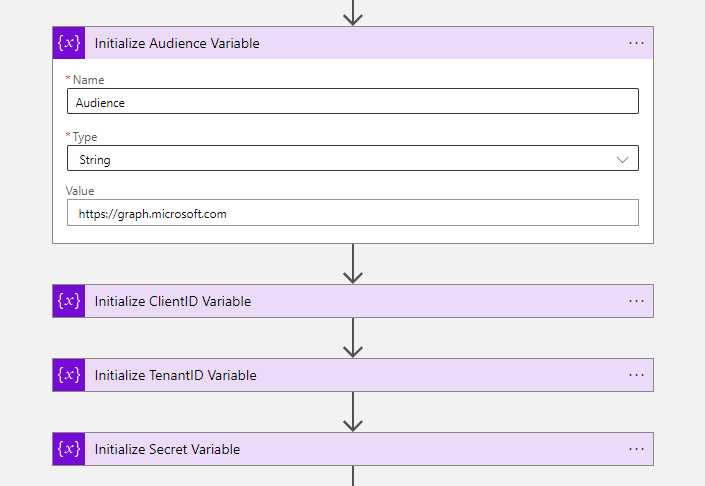
- The next four steps of the workflow are to initialize variables.
| Initialize Audience Variable | Initialize TenantID Variable | Initialize ClientID Variable | Initialize Secret Variable | |
|---|---|---|---|---|
| Name | Audience | ClientID | TenantID | Secret |
| Type | String | String | String | String |
| Value | https://graph.microsoft.com | {Paste your Tenant ID} | {Paste your Client ID} | {Paste your Secret} |
- The next step is to get the Conditional Access audit log events via an HTTP Get request
| Method | GET |
|---|---|
| Authentication Type | Active Directory OAuth |
| Tenant | @{variables(‘TenantID’)} |
| Audience | @{variables(‘Audience’)} |
| Client ID | @{variables(‘ClientID’)} |
| Credential Type | Secret |
| Secret | @{variables(‘Secret’)} |
- URI:
https://graph.microsoft.com/beta/auditLogs/directoryAudits?$filter=%20activityDateTime%20gt%20@{formatDateTime(addMinutes(utcNow(),-5),'yyyy-MM-ddTHH:mm:ssZ')} and category eq 'Policy' and loggedByService eq 'Conditional Access'- Now we have all the Conditional Access audit log events of the last 5 minutes we create a for each action with the following configuration.
- Now we have to create a for each loop because it could happen that more Conditional access rules have been changed
Expression: body('HTTP_Get_-_Conditional_Access_Audit_Logs')?['value']- In the for each loop, we create a condition action because a Conditional Access policy can be changed by a user or an app.
Expression: empty(items('Apply_To_Each_Conditional_Access_Log_Event')?['initiatedBy']?['user']?['userPrincipalName'])

is equal to

Expression: false- In the Yes condition, we must create an HTTP post action
- Paste the copied webhook URL in the URI field
- The body of the HTTP Post action must be filled with the code of the Adaptive card
{
  "attachments": [
    {
      "content": {
        "$schema": "http://adaptivecards.io/schemas/adaptive-card.json",
        "body": [
          {
            "columns": [
              {
                "items": [
                  {
                    "text": "@{items('Apply_To_Each_Conditional_Access_Log_Event')?['loggedByService']} activity by @{items('Apply_To_Each_Conditional_Access_Log_Event')?['initiatedBy']?['user']?['userPrincipalName']}",
                    "type": "TextBlock",
                    "weight": "bolder",
                    "wrap": true
                  },
                  {
                    "isSubtle": true,
                    "spacing": "none",
                    "text": "@{formatDateTime(item()?['activityDateTime'], 'U')}",
                    "type": "TextBlock",
                    "wrap": true
                  }
                ],
                "type": "Column",
                "width": "stretch"
              }
            ],
            "type": "ColumnSet"
          },
          {
            "facts": [
              {
                "title": "Name:",
                "value": "@{item()?['targetResources'][0]?['displayName']}"
              },
              {
                "title": "Initiator:",
                "value": "@{items('Apply_To_Each_Conditional_Access_Log_Event')?['initiatedBy']?['user']?['userPrincipalName']}"
              },
              {
                "title": "Type:",
                "value": "@{items('Apply_To_Each_Conditional_Access_Log_Event')?['loggedByService']}"
              },
              {
                "title": "Timestamp:",
                "value": "@{items('Apply_To_Each_Conditional_Access_Log_Event')?['activityDateTime']}"
              },
              {
                "title": "Activity:",
                "value": "@{items('Apply_To_Each_Conditional_Access_Log_Event')?['activityDisplayName']}"
              }
            ],
            "type": "FactSet"
          }
        ],
        "msteams": {
          "width": "Full"
        },
        "type": "AdaptiveCard",
        "version": "1.5"
      },
      "contentType": "application/vnd.microsoft.card.adaptive",
      "contentUrl": null
    }
  ],
  "type": "message"
}- In the No condition, we also create an HTTP post
- Paste again the webhook URL in the URI field
- The body of the HTTP Post action must be filled with the code of the Adaptive card
{
  "attachments": [
    {
      "content": {
        "$schema": "http://adaptivecards.io/schemas/adaptive-card.json",
        "body": [
          {
            "columns": [
              {
                "items": [
                  {
                    "text": "@{items('Apply_To_Each_Conditional_Access_Log_Event')?['loggedByService']} activity by App ID: @{items('Apply_To_Each_Conditional_Access_Log_Event')?['initiatedBy']?['app']?['appId']}",
                    "type": "TextBlock",
                    "weight": "bolder",
                    "wrap": true
                  },
                  {
                    "isSubtle": true,
                    "spacing": "none",
                    "text": "@{formatDateTime(item()?['activityDateTime'], 'U')}",
                    "type": "TextBlock",
                    "wrap": true
                  }
                ],
                "type": "Column",
                "width": "stretch"
              }
            ],
            "type": "ColumnSet"
          },
          {
            "facts": [
              {
                "title": "Name:",
                "value": "@{item()?['targetResources'][0]?['displayName']}"
              },
              {
                "title": "Initiator:",
                "value": "Application id : @{items('Apply_To_Each_Conditional_Access_Log_Event')?['initiatedBy']?['app']?['appId']}"
              },
              {
                "title": "Type:",
                "value": "@{items('Apply_To_Each_Conditional_Access_Log_Event')?['loggedByService']}"
              },
              {
                "title": "Timestamp:",
                "value": "@{items('Apply_To_Each_Conditional_Access_Log_Event')?['activityDateTime']}"
              },
              {
                "title": "Activity:",
                "value": "@{items('Apply_To_Each_Conditional_Access_Log_Event')?['activityDisplayName']}"
              }
            ],
            "type": "FactSet"
          }
        ],
        "msteams": {
          "width": "Full"
        },
        "type": "AdaptiveCard",
        "version": "1.5"
      },
      "contentType": "application/vnd.microsoft.card.adaptive",
      "contentUrl": null
    }
  ],
  "type": "message"
}
Note. More information about Adaptive cards designs can be found here
- Save the Logic App and Click on Run Trigger











 Hi! My name is René Laas. I have passion and enthusiasm for the Microsoft 365 Cloud. I am based in the Netherlands.

Leave a Reply
Want to join the discussion?Feel free to contribute!