Manage File Type Associations via Intune
The purpose of this blog post is to inform you how to manage the File Type Associations for Windows 10 and 11 via Microsoft Intune
By default, it is only possible to set one File Type association per file type extension. Also, it is only possible to configure one File Type Association XML file. This XML file must be Base64 encoded. In this blog post, I will explain how to manage the File Type Associations via Microsoft Intune via Settings Catalog and Custom Configuration Profiles
Requirements:
File type Associations
Every file has an extension. E.g., .pdf, .xlsx, .txt. Those extensions are used to determine with which application these files will be opened. A File Type Association associates the file extension with an application, so when a file type association is set, the file will be opened with the configured application.
File type associations can be set manually in Windows 10/11 via four methods: Settings, File properties, File Explorer and, control panel.
File Type Associations can also be set via Intune, there are different built-in options available. File Type Associations can e.g., be set via a Custom Policy with an OMA-URI or via Setting catalogs. File types can also be set via a PowerShell script, but I prefer the built-in methods.
The File Type Associations file that will be used to set the File Type Associations must be an XML file and encoded in Base64.
Official Microsoft documentation about File Type Associations can be found here
Built-in methods to configure File Type Associations via Intune
File Type Associations can be set via the following built-in methods. But I prefer the Settings catalog method. No hassle with OMA-URI, just a search screen to find the needed configuration setting and with info and a link to the official Microsoft documentation.
Custom device configuration profile
- Open Microsoft endpoint manager
- In the menu select Devices
- Under Devices, select Windows and select configuration profiles
Or use the following link Windows – Microsoft Endpoint Manager admin center - Click on + Create Profile
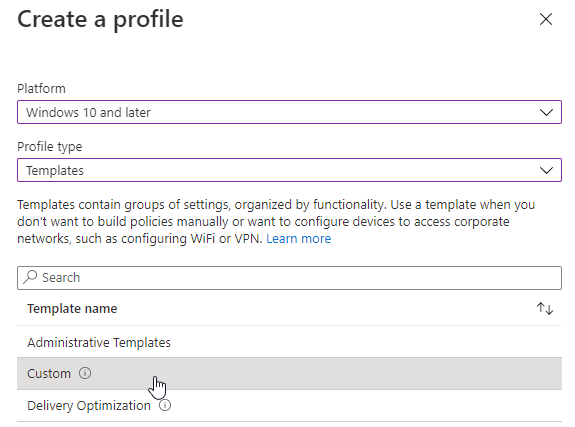
- Select Windows 10 and later as the platform
- Select Templates as the profile type and select Custom
- Click on Create
- Provide a policy name, e.g., EndpointCave-PRD-W10-Custom-FileTypeAssociation
- Set a description, so that everyone with access to the portal knows the purpose
- Click on Next and configure the custom Configuration profile
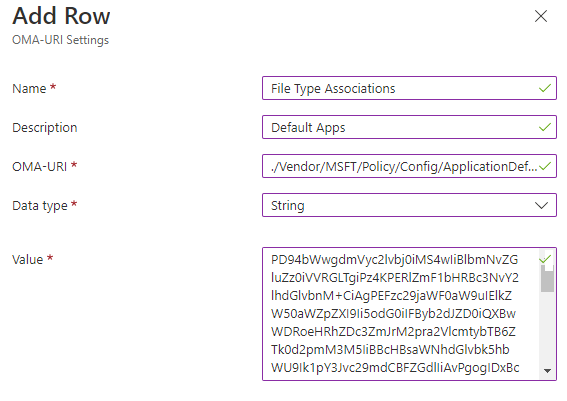
- Click on the Add button to add an OMA-URI
- Fill in OMA-URI data as described in below table.
| Name | Description | Data Type | Value |
|---|---|---|---|
| File Type Associations | Default Apps | String | File type association XML |
OMA-URI
./Vendor/MSFT/Policy/Config/ApplicationDefaults/DefaultAssociationsConfiguration- Click on Next
- Enter a scope tag if needed and click on Next
- Assign the profile to a group and click on Next
- Set an applicability rule if needed and click on Next
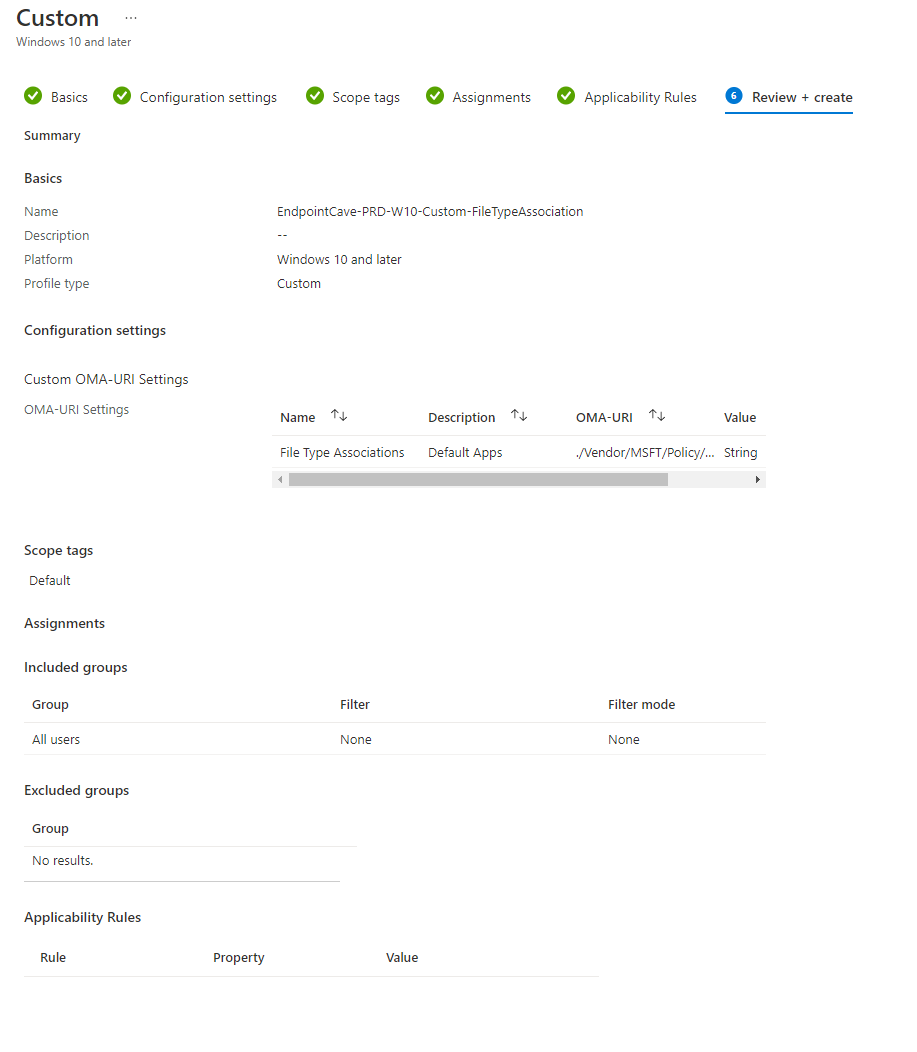
- Check the configuration at the Review + Create page and click on Create
Setting catalogs
- Open Microsoft endpoint manager
- In the menu select Devices
- Under Devices, select Windows and select configuration profiles
Or use the following link Windows – Microsoft Endpoint Manager admin center - Click on + Create Profile
- Select Windows 10 and later as the platform
- Select Settings catalog as the profile type
- Click on Create
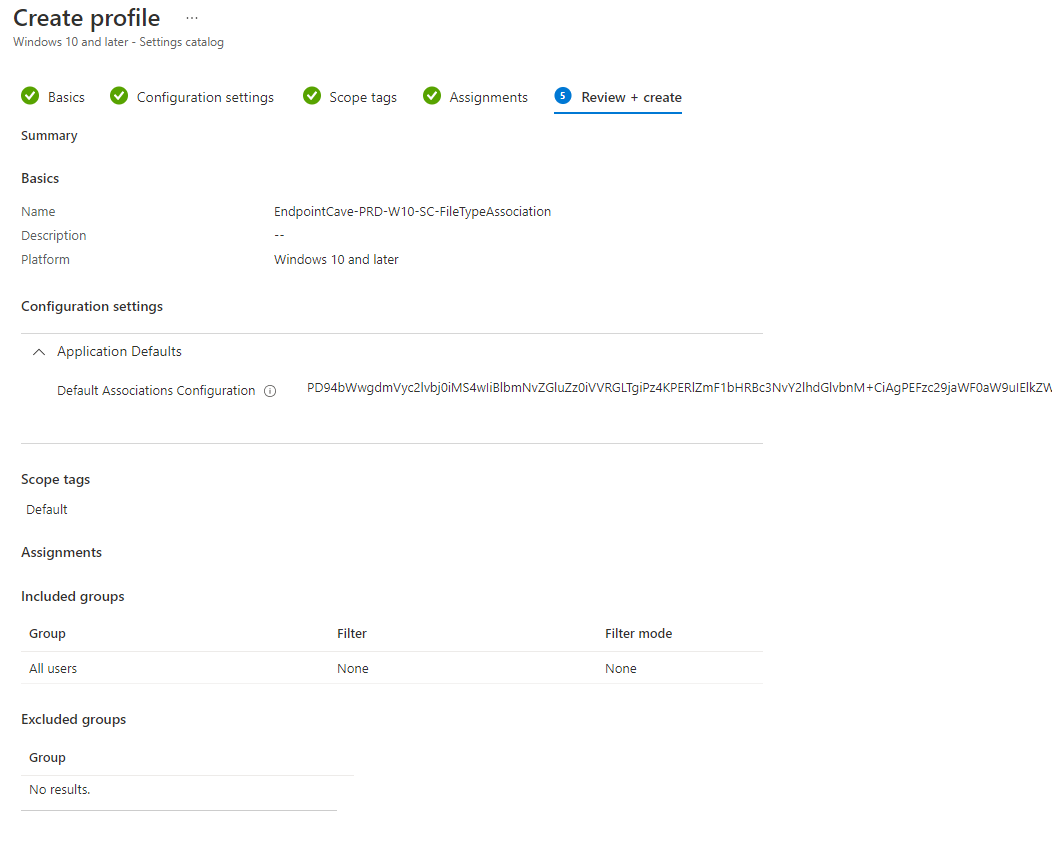
- Provide a policy name, e.g., EndpointCave-PRD-W10-SC-FileTypeAssociation
- Set a description, so that everyone with access to the portal knows the purpose
- Click on Next
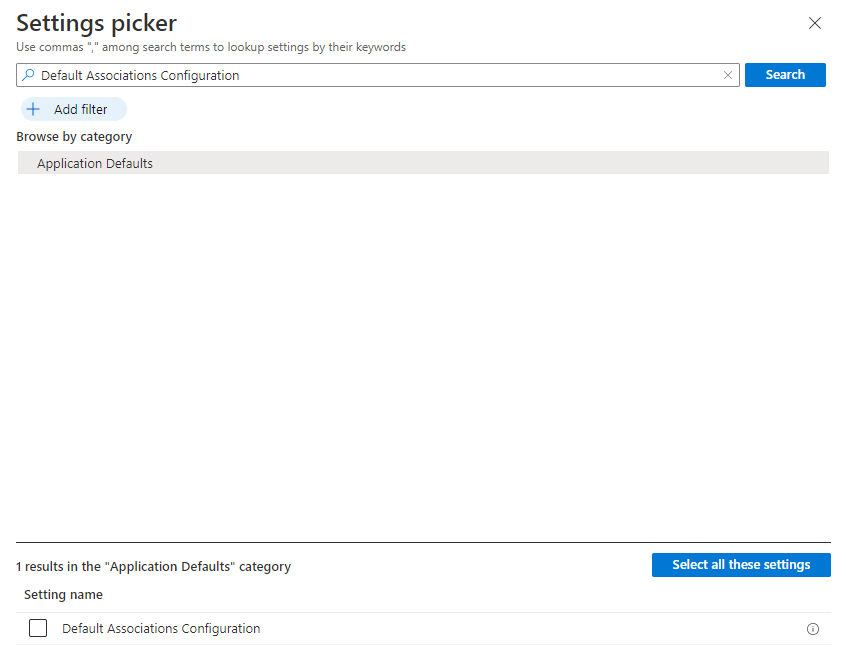
- Click on + Add settings to add Default Associations Configuration
Note. The setting Default Associations Configuration is listed under the category Application Defaults.
- Select the checkbox before Default Associations Configuration the settings is now available in the Configuration settings section
- Close the Settings Picker
- Paste the Base64 encoded File Type Association XML file in the input field
- Click on Next
- Enter a scope tag if needed and click on Next
- Assign the profile to a group and click on Next
- Check the configuration at the Review + Create page and click on Create




 Hi! My name is René Laas. I have passion and enthusiasm for the Microsoft 365 Cloud. I am based in the Netherlands.
 Raphael Schaller
I can\t see “Custom” under configuration profile.
Hi Hadi,
Did you select Devices->Windows -> configuration profiles -> + Create Profile -> Windows 10 and later as platform and templates as profile type?
After you select Templates as the profile type, I have the option Custom. Are you sure you have all the needed rights in Intune?
Just tried it by copying the XML value (I red that Intune doesn’t need base64 encoding anymore) and it works like a charm! Thanks!
Hello Jan
I encoded the xml file in base64 and applied on already enrolled Virtual machine through settings catalog. Policy is applied successfully but the default apps are not changed.
we want to change the default mail app to outlook and .pdf to Adobe Acrobat Reader DC. Both apps are installed after applying the policy.
Wanted to know from you, how did you created the policy and dose it worked on already enrolled devices?
Shoudl this work on Win 11 22H2? Settings are not applied.