Manage File Type Associations via Microsoft List
The purpose of this blog post is to inform you how to manage the file type associations via a Microsoft List and make it easier to manage the File Type Associations.
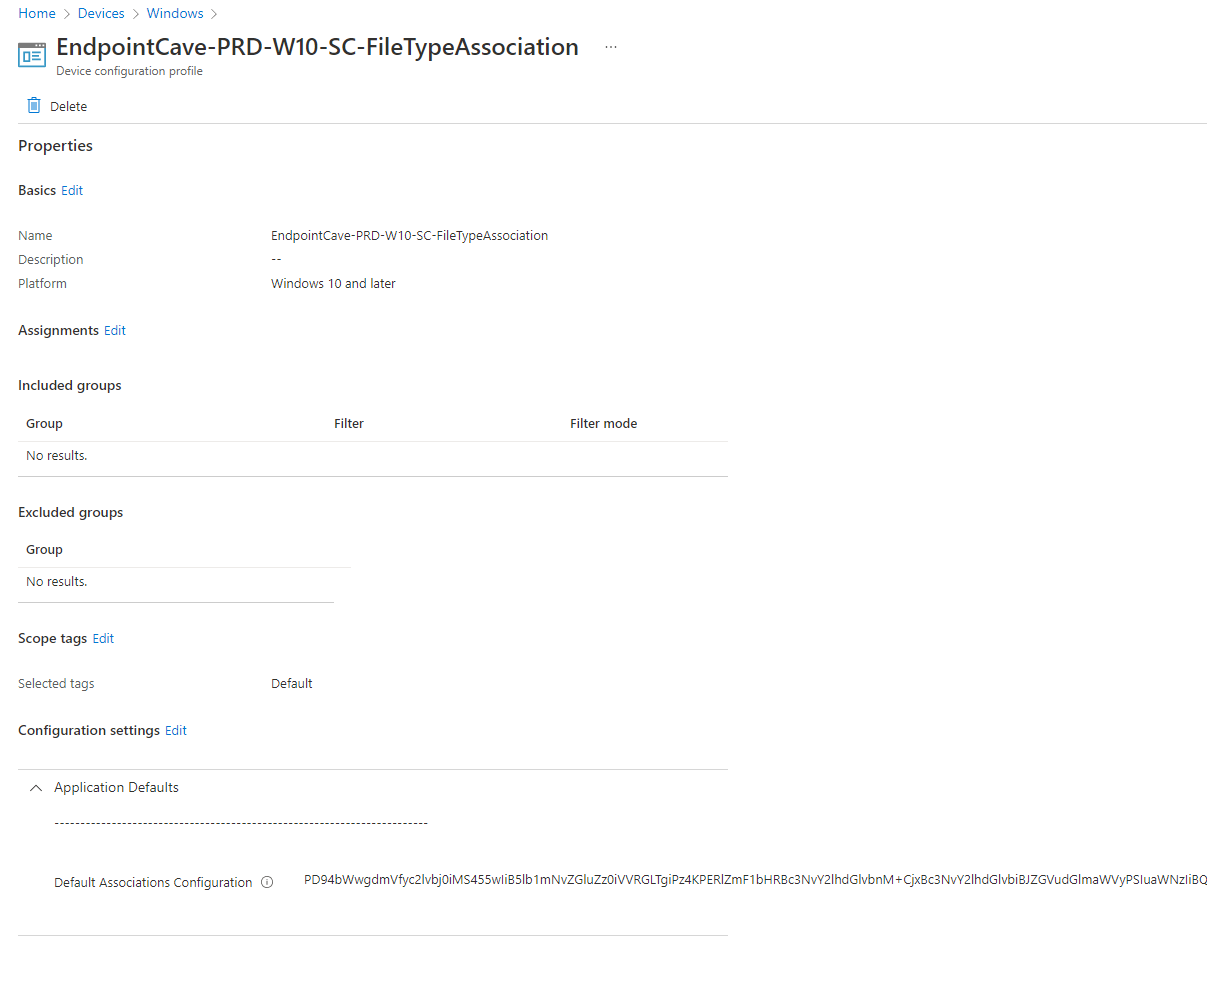
In my previous blog post, I explained how to manage file type associations via Intune with a Custom Configuration Policy and a Settings catalog policy.
But every time I want to know, which application did I associate. I must decode the value of the policy to check. If I want to remove or add an application I must decode the XML, apply the changes, and encode it again.
I thought it can be easier to manage the File Type Association, so I decide to use Microsoft List. I have all the managed File Type Associations in an overview in plain text. But still, if I update my File Type Association list, I had to manually change my policy. So, I created an Azure Logic App that has a trigger on the list and update my policy.
Requirements:
License requirements:
Graph API Requirements:
Part 1 – Create App Registration
- Open azure.com
- Click on Azure Active Directory
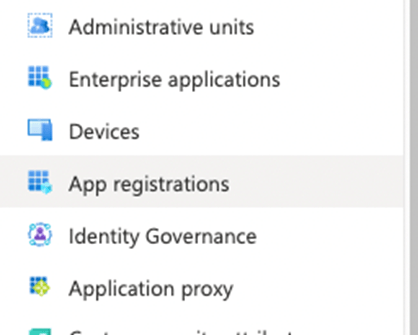
- Click on App Registrationin the left menu
Or use the following link Active Directory | App Registration
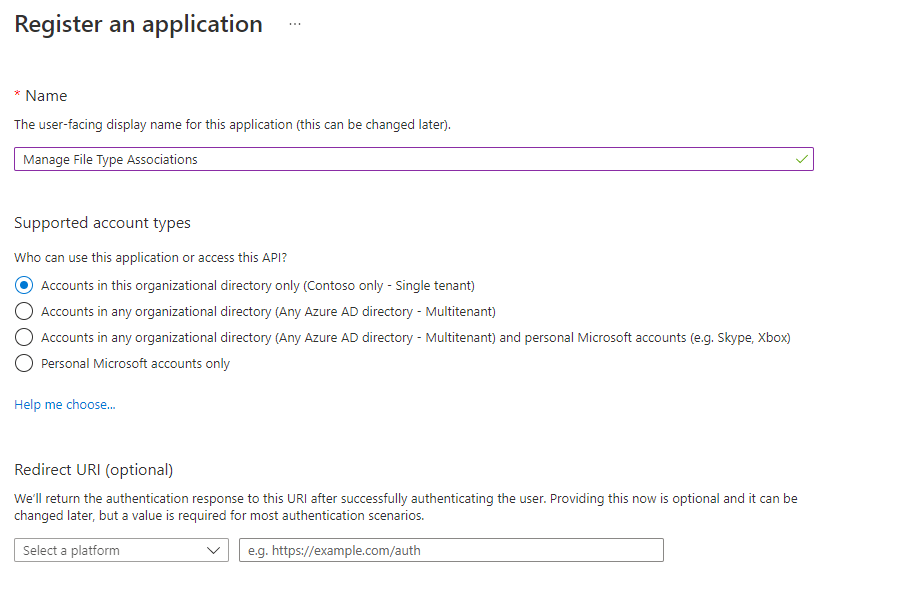
- Click on + New registration
- Configure an app name e.g., Manage File Type Associations
- Click on the Register button, the app will be created and automatically opened.
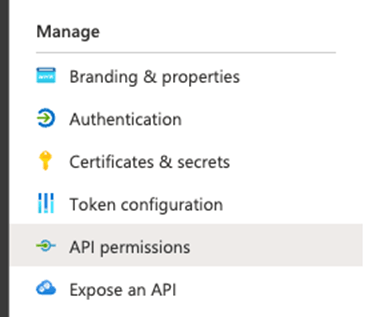
- In the menu click on API Permissions
- Click on+ Add a permission
- Select Microsoft Graph and select Application permissions
- Search and add the following permissions
DeviceManagementConfiguration.ReadWrite.All
DeviceManagementConfiguration.Read.All- Grant admin consent for your organization
- In the menu click on Certificates & Secrets
- Click on + New Client secret
- Set a description and the expiry of the secret and click on Add
- Copy the value of the secret, this is required in part 3
- Go to the overview page and copy the Client ID and Tenant ID, those are also required in part 3
Part 2 – Create Microsoft List
- Open office.com
- Click on the menu button
- Click on SharePoint(if you are missing the SharePoint button click on all apps)
- Open an existing SharePoint Site (if you do not have a site, create a site via the creating site button and select communication site)
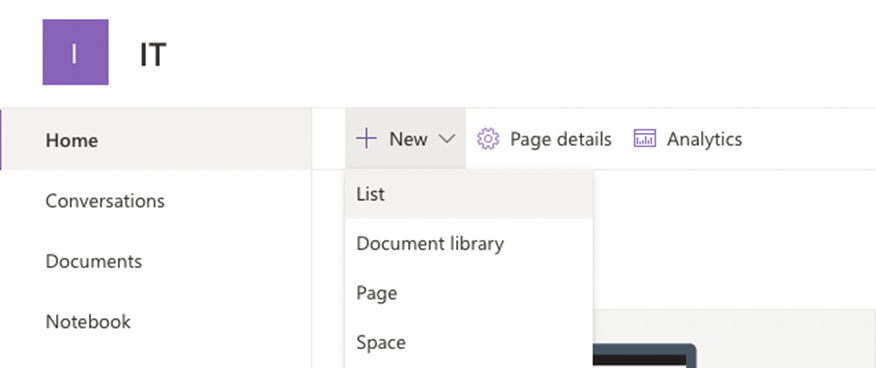
- When you are on the SharePoint site, click on + new button and select
- Select Blank list in the create list screen and set the following Microsoft List details
| Setting | Value |
|---|---|
| Name | File Type Association |
| Description | Windows 10 Global File Type Association list |
| Site Navigation | Unchecked |
- You will automatically be redirected to your new list.
- Click on the title column and goes to the Column settings and click on rename and rename column to Application Name. Click on Save
- Click on + add column. Select Single line of text and create two new columns with the following details
| Setting | Column 1 | Column 2 |
|---|---|---|
| Name | Identifier | ProgId |
| Description | File type identifier | File type ProgID |
| Type | Single line of text | Single line of text |
| Default Value | – | – |
| Use calculated value | Unchecked | Unchecked |
Part 3 – Create Azure Logic App
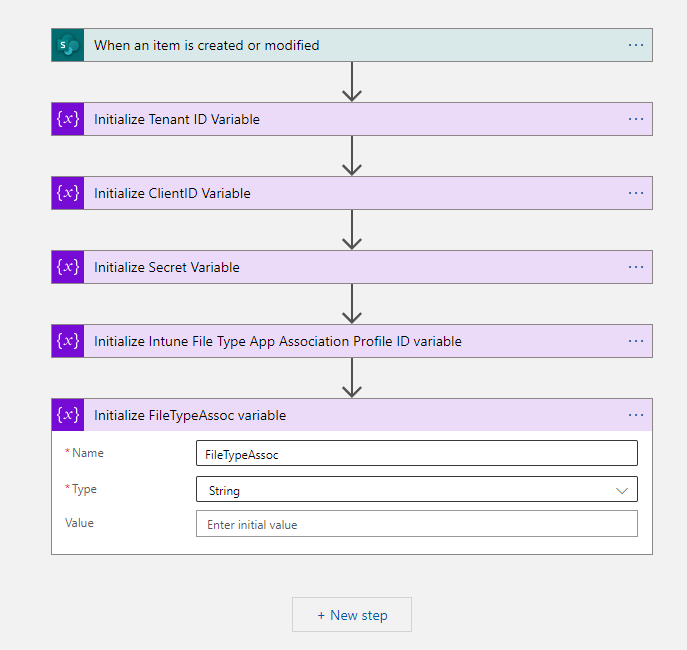
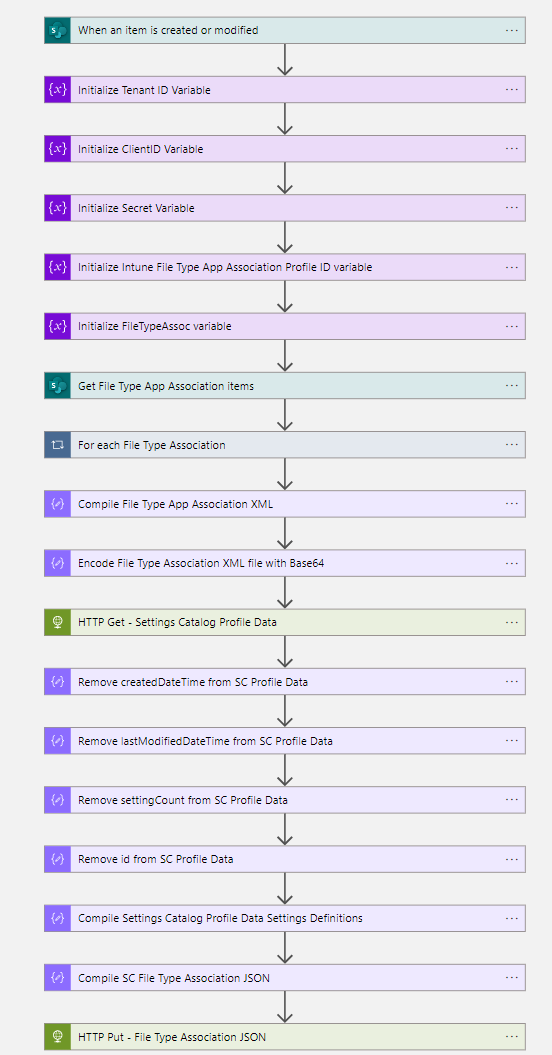
Note. Rename every Azure Logic App action to match the screenshots!
- Open portal.azure.com
- Search for Logic App
- Click on + Add
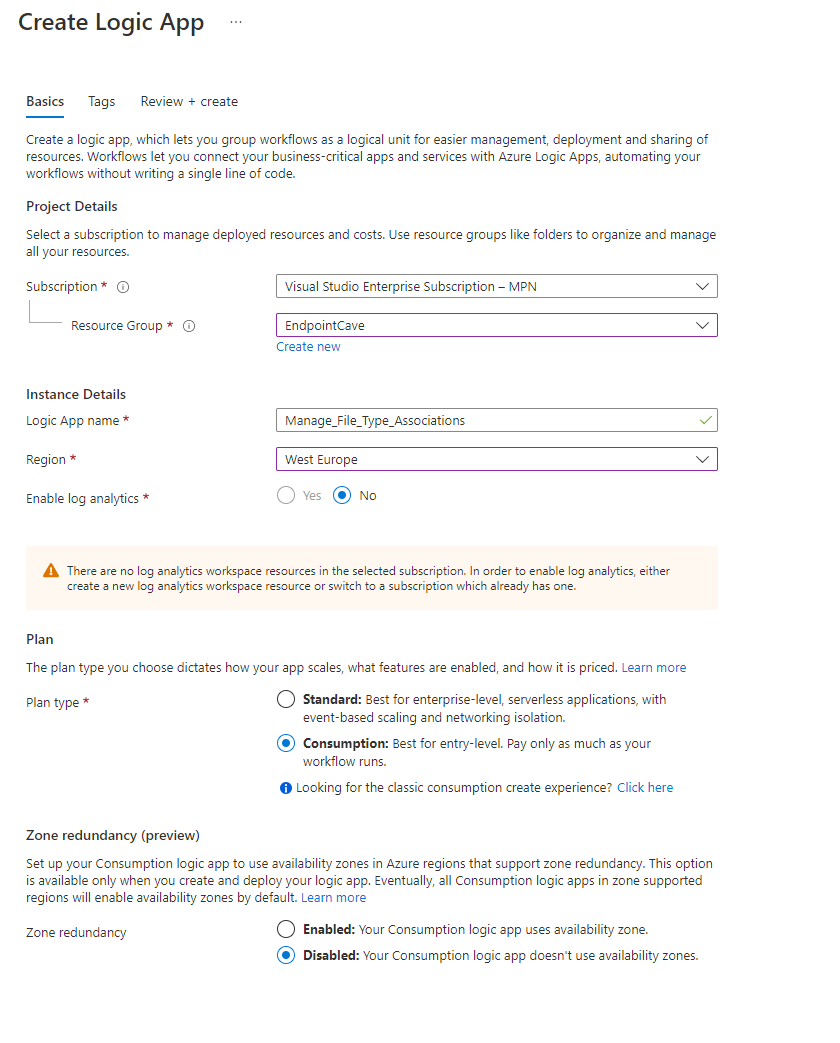
- Select an existing Resource Group or create a new Resource Group
- Select the instance Type (I have chosen Consumption-based, because it is cheaper to use, and it is only one flow. See Azure Calculator)
- Set a Logic App name under Instance Details
- Select your region
- click on Review + Create
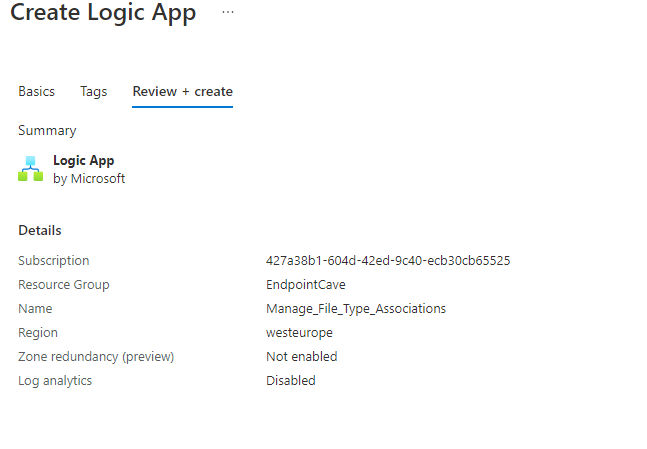
- Check the details on the Review + Create page and click on Create
- After the deployment is completed, go to your new Logic App via Go to Resource button
- Select Blank logic App under templates
- Now we must trigger the Azure Logic App, the trigger will be SharePoint – When an item is created or modified
- Click on the Sign in button and login with an account that has read/write access to the Microsoft List you had created in Part 2. I have selected my admin account
- Select the Microsoft List SharePoint Site Address and the Microsoft List you have created in Part 2
- Set how many times you want to check if the list is changed by How often do you want to check for items? I selected every hour, but it is up to you how fast you want to update.
- The next five steps are to initialize variables.
| Initialize Tenant ID Variable | Initialize ClientID Variable | Initialize Secret Variable | Initialize Intune File Type App Association Profile ID variable | Initialize FileTypeAssoc variable | |
|---|---|---|---|---|---|
| Name | TenantID | ClientID | Secret | ProfileID | FileTypeAssoc |
| Type | String | String | String | String | String |
| Value | {Paste the Tenant ID from part 1} | {Paste the Client ID from part 1} | {Paste the secret from part 1} | {Paste the Profile ID of the FTA Settings catalog} | – |
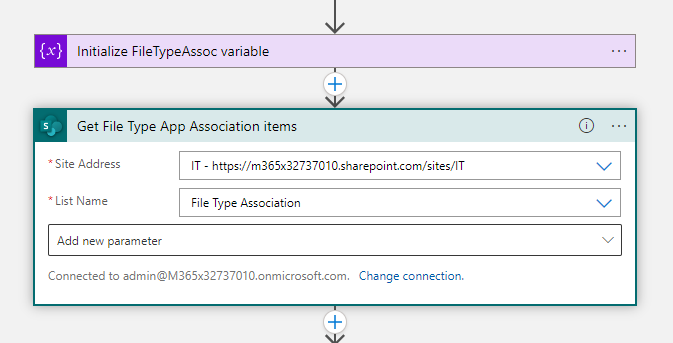
- The next step is SharePoint – get items, Select the same Microsoft List SharePoint Site Address and the Microsoft List as you have used in the trigger.
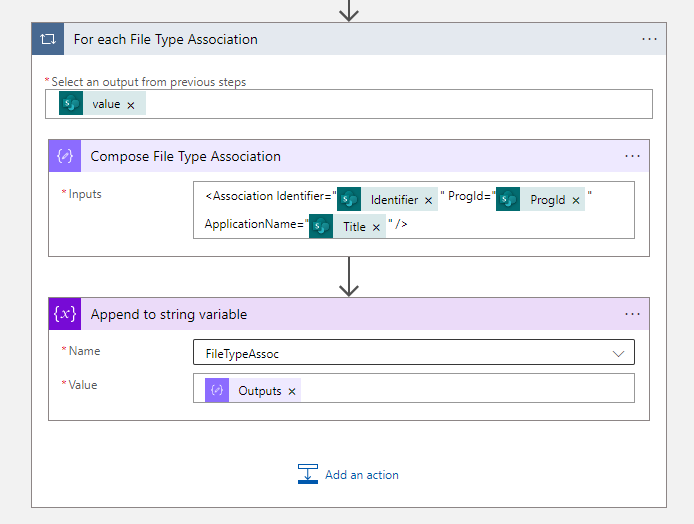
- Create now a for each loop with the value of Get File Type App Association items.
- Add a Compose action in the For each File Type Association
<Association Identifier="@{items('For_each_File_Type_Association')?['Identifier']}" ProgId="@{items('For_each_File_Type_Association')?['ProgId0']}" ApplicationName="@{items('For_each_File_Type_Association')?['Title']}" />- Now we must create and Append to string variable action.
| Setting | Value |
|---|---|
| Name | FileTypeAssoc |
| Value | @{outputs(‘Compose_File_Type_Association’)} |
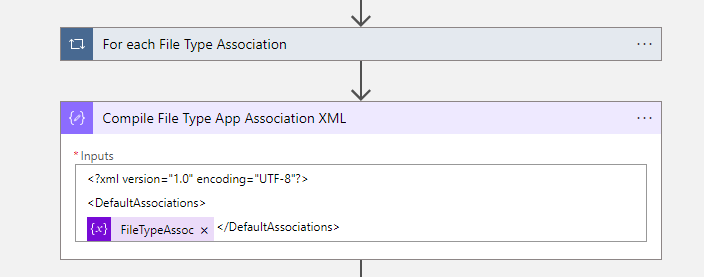
- After the For each File Type Association We must create a compose action to compile the File Type Association XML.
<?xml version="1.0" encoding="UTF-8"?>
<DefaultAssociations>
@{variables('FileTypeAssoc')}</DefaultAssociations>- Now it is time to encode the File Type Association XML file with Base64. Add a compose action
@{base64(outputs('Compile_File_Type_App_Association_XML'))}- The File Type Association file is ready to deploy. Create an HTTP action to get the Settings Catalog Profile Data
| Setting | Value |
|---|---|
| Method | GET |
| Authentication Type | Active Directory OAuth |
| Tenant | @{variables(‘TenantID’)} |
| Audience | https://graph.microsoft.com/ |
| Client ID | @{variables(‘ClientID’)} |
| Credential Type | Secret |
| Secret | @{variables(‘Secret’)} |
- URI:
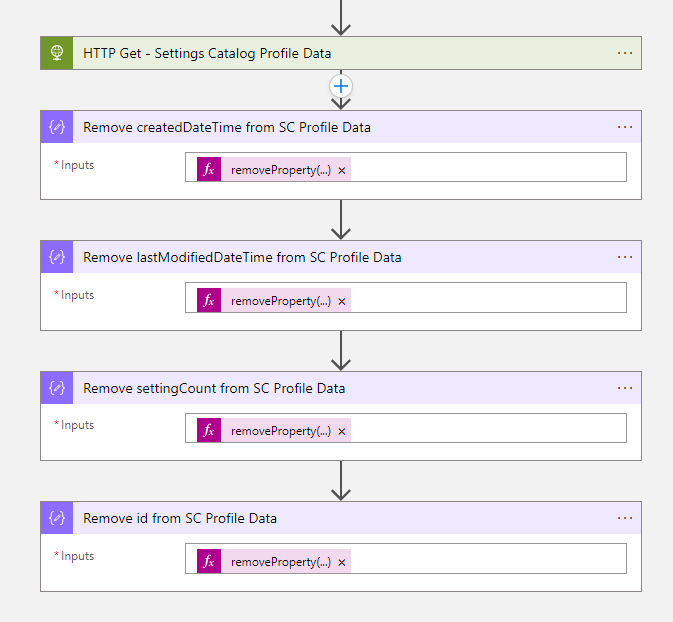
https://graph.microsoft.com/beta/deviceManagement/configurationPolicies/@{variables('ProfileID')}- Now we have the Settings Catalog profile data, we must remove some properties to import the File Type Association XML base64 file. Create four compose actions.
Remove createdDateTime from SC Profile Data:
@{removeProperty(body('HTTP_Get_-_Settings_Catalog_Profile_Data'),'createdDateTime')}Remove lastModifiedDateTime from SC Profile Data:
@{removeProperty(outputs('Remove_createdDateTime_from_SC_Profile_Data'),'lastModifiedDateTime')}Remove settingCount from SC Profile Data:
@{removeProperty(outputs('Remove_lastModifiedDateTime_from_SC_Profile_Data'),'settingCount')}Remove id from SC Profile Data:
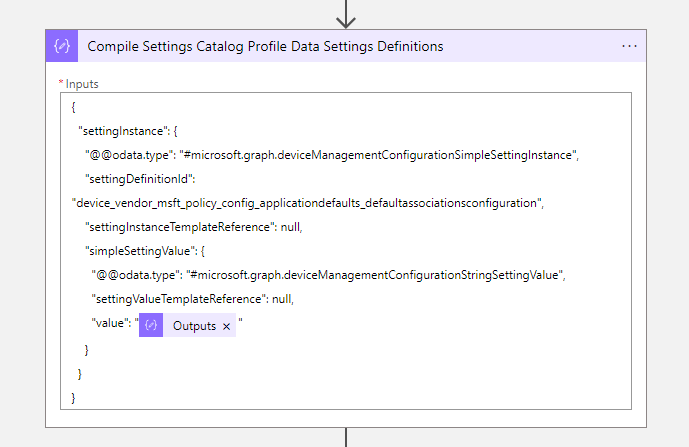
@{removeProperty(outputs('Remove_settingCount_from_SC_Profile_Data'),'id')}- After we have removed the properties, we will Compile Settings Catalog Profile Data Settings Definitions via a compose action
{
  "settingInstance": {
    "@@odata.type": "#microsoft.graph.deviceManagementConfigurationSimpleSettingInstance",
    "settingDefinitionId": "device_vendor_msft_policy_config_applicationdefaults_defaultassociationsconfiguration",
    "settingInstanceTemplateReference": null,
    "simpleSettingValue": {
      "@@odata.type": "#microsoft.graph.deviceManagementConfigurationStringSettingValue",
      "settingValueTemplateReference": null,
      "value": "@{outputs('Encode_File_Type_Association_XML_file_with_Base64')}"
    }
  }
}- Now it is time to built up the JSON. Create a compose action to Compile SC File Type Association JSON
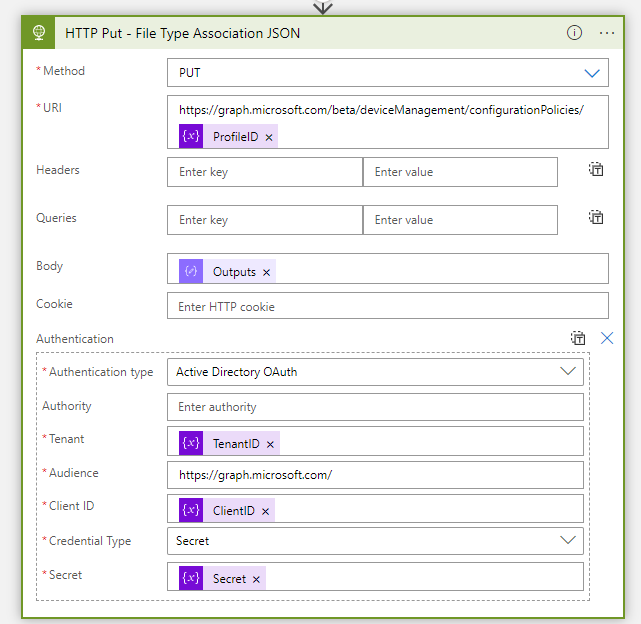
addProperty(outputs('Remove_id_from_SC_Profile_Data'),'settings',array(outputs('Compile_Settings_Catalog_Profile_Data_Settings_Definitions')))- The JSON is ready to update the File Type Association in the Settings Catalog Profile. Create the last HTTP action
| Setting | Value |
|---|---|
| Method | GET |
| Authentication Type | Active Directory OAuth |
| Tenant | @{variables(‘TenantID’)} |
| Audience | https://graph.microsoft.com/ |
| Client ID | @{variables(‘ClientID’)} |
| Credential Type | Secret |
| Secret | @{variables(‘Secret’)} |
| Body | @{outputs(‘Compile_SC_File_Type_Association_JSON’)} |
- URI:
https://graph.microsoft.com/beta/deviceManagement/configurationPolicies/@{variables('ProfileID')}- The Azure Logic App Flow is ready and now it is time to add File Type Associations in the Microsoft List.
Note. The Azure Logic app has the trigger When an item is created or modified, so it will only change or add File Type associations and not removing any items. So, you must duplicate the Logic App and change the trigger to When an item is deleted.
You can also set a multiple trigger on your Azure logic app. See my KB item about multiple triggers for Azure Logic Apps. Logic app with multiple triggers – Endpoint Cave








 Hi! My name is René Laas. I have passion and enthusiasm for the Microsoft 365 Cloud. I am based in the Netherlands.
 Chiara F
Leave a Reply
Want to join the discussion?Feel free to contribute!