Automate your minimum OS build in your Compliance Policies
Published: July 09, 2023 | Author: René Laas
The purpose of this blog post is to inform you how to automate your minimum and supported Windows OS build and configure this version in a Compliance Policy.
In my previous blog post, I explained how to design your compliance policy. Why do you even need a compliance policy, which stakeholder do you need, configuration options, etc? In my other blog post, I explained how to roll out your compliance policy and a strategy that you can use, How to configure compliance policies with Microsoft Intune, and how to configure a custom compliance policy script with multiple checks.
Today, security is more important than ever, and staying up-to-date plays a key role in maintaining a secure environment. In this blog post, I will explain how to scrape the latest Windows build from the Microsoft documentation and select your supported Windows build like N -1 and configure this in a compliance policy in an automated way.
Requirements:
License requirements:
Graph API Permissions:
What is a compliance policy?
Intune compliance policy is a security feature of Microsoft Intune. Intune compliance policies are used to ensure that mobile devices that access company data are secure and meet certain security requirements.
Intune compliance policies are used to enforce settings on devices such as encryption, password requirements, device enrollment, jailbreak detection, and more. Compliance policies also enable administrators to specify rules for devices based on their ownership type (company-owned vs. personal), device platform (Android, iOS, Windows), and device state (compliant vs. non-compliant).
By setting up Intune compliance policies, organizations can ensure that their devices are secure and that they are following the regulations and policies. Compliance policies can help protect company data, as well as ensure that employees are following best practices for device security.
Minimum OS build in Compliance Policies
The Minimum OS Version requirement is an component of the Intune compliance policy. It ensures that devices enrolled in Intune meet the specified operating system version for optimal security, compatibility, and performance.
By setting a minimum OS version, administrators can enforce a standard across all managed devices, regardless of their operating system. This policy will also help to protect against vulnerabilities associated with outdated operating systems and ensures that devices have the necessary features and updates to support the organization’s applications and security measures.
Note. If you want to accomplish the same thing, but do you prefer PowerShell instead of Azure Logic Apps, please follow Andrew Taylor’s blog, which uses a Custom Compliance policy PowerShell script.
Automate minimum OS build for all Windows Compliance Policies
To connect to the Graph API, you need an Azure AD app registration.
Note. In this example, I have used an App registration with App secret. Keep in mind this is not the most securest way to connect to the Graph API. For production environments please use a managed identity of Certificate.
Create App Registration
- Open azure.com
- Click on Azure Active Directory
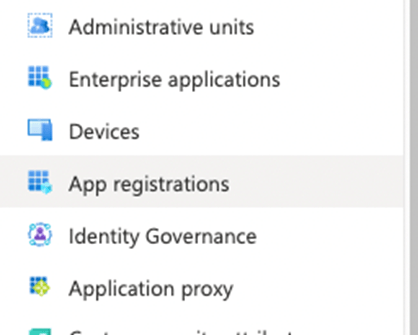
- Click on App Registration in the left menu
Or use the following link Active Directory | App Registration
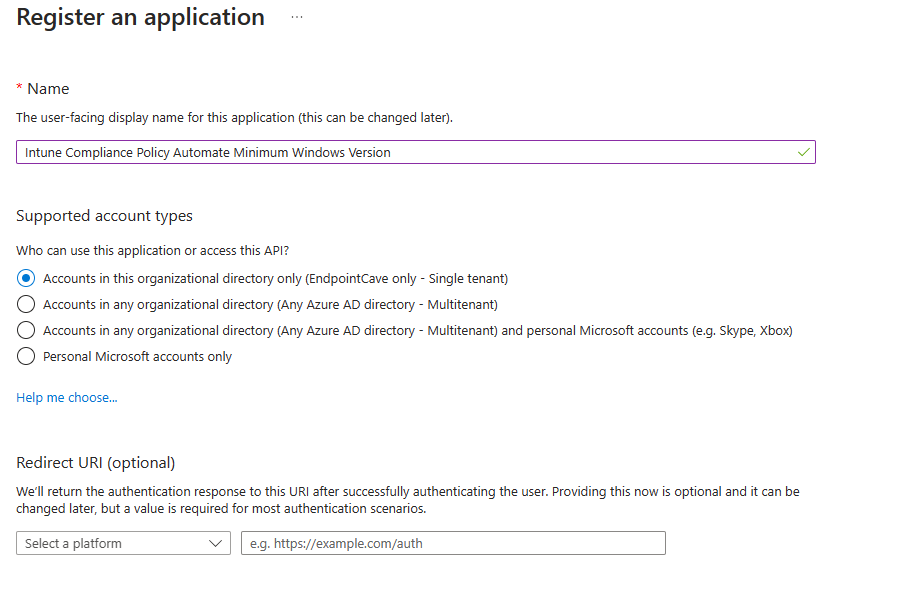
- Click on + New registration
- Configure an app name e.g., Intune Compliance Policy Automate Minimum Windows Version
- Click on the Register button, the app will be created and automatically opened.
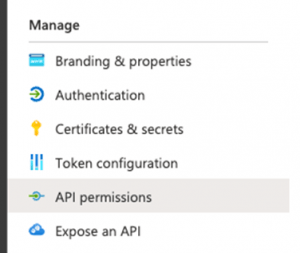
- In the menu click on API Permissions
- Click on+ Add a permission
- Select Microsoft Graph and select Application permissions
- Search and add the following permissions
DeviceManagementConfiguration.ReadWrite.All
DeviceManagementConfiguration.Read.All- Grant admin consent for your organization
- In the menu click on Certificates & Secrets
- Click on + New Client secret
- Set a description and the expiry of the secret and click on Add
- Copy the value of the secret,
- Go to the overview page and copy the Client ID and Tenant ID
Create an Azure Logic App
Note. Rename every Azure Logic App action to match the screenshots!
- Open azure.com
- Search for Logic App
- Click on + Add
- Select an existing Resource Group or create a new Resource Group
- Select the instance Type (I have chosen Consumption, but check the Azure Calculator which option fits your environment)
- Select your region and click on Review + Create
- Check the details on the Review + Create page and click on Create
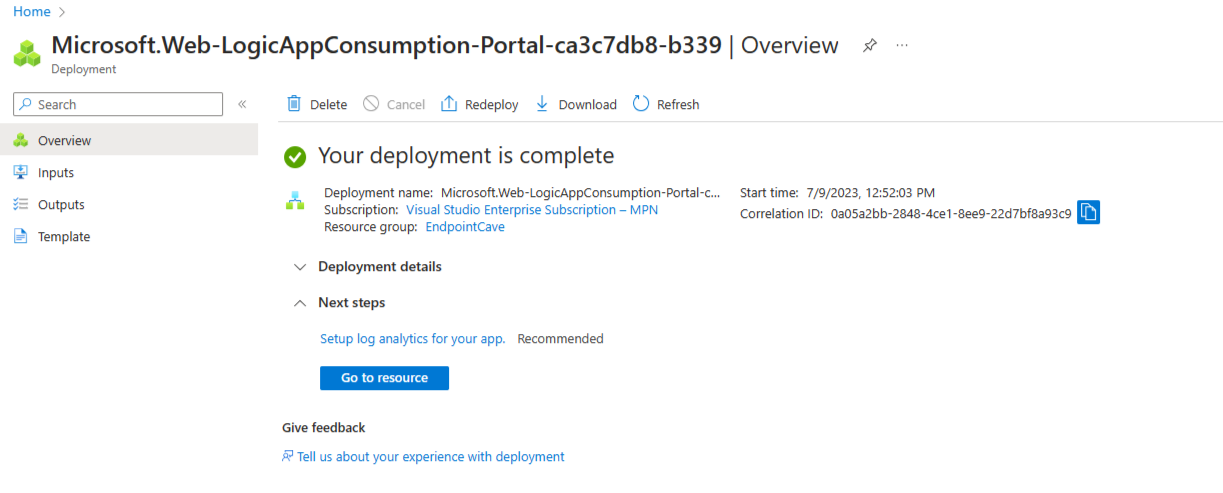
- After the deployment is completed, go to your new Logic App via Go to Resource button
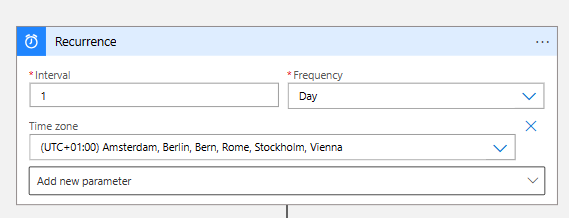
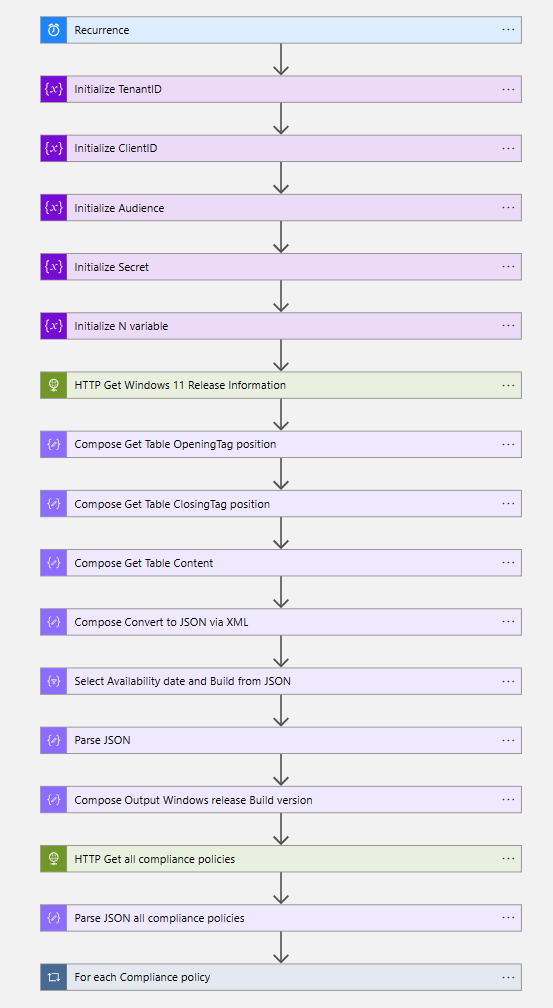
- The first step of the workflow is the Recurrence trigger, based on the desired interval
Note. I have used a 1 daily interval in this blog.
- The next five steps of the workflow are to initialize variables.
| Name | Type | Value | |
|---|---|---|---|
| Initialize TenantID | TenantID | String | {Paste your Tenant ID} |
| Initialize ClientID | ClientID | String | {Paste your Client ID} |
| Initialize Audience | Audience | String | https://graph.microsoft.com |
| Initialize Secret | Secret | String | {Paste your Secret} |
| Initialize N variable | N | Integer | {Enter your value} |
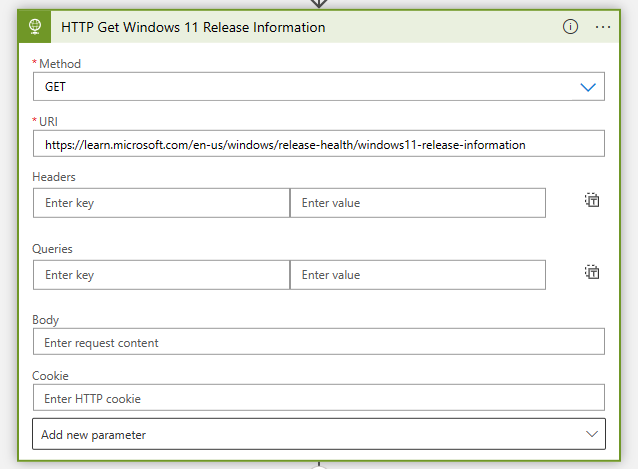
- The first action after the five variables is to add an HTTP action to get the information from the Microsoft documentation.
URI:
https://learn.microsoft.com/en-us/windows/release-health/windows11-release-information- After you run the Logic app, the HTTP action HTTP Get Windows 11 Release Information will return the source code of the Microsoft documentation. Not very useful.
- But as you already know. The data is stored in a table so, search for the table tag. As you can see in the source code, there are three tables tag available.
- The build information is stored in the second table. You must use this table to get the latest build versions. Ok, now you know that. How do you get the information from the source code into a Compliance policy?
- Create a compose action.
- Click on the input field of the Compose action. Click on Add dynamic content if the popup will not be shown.
- Click on the expression tab and in the input field of the expression tab. Type, and search for nthindexof. Which allows you to return the position of a string.
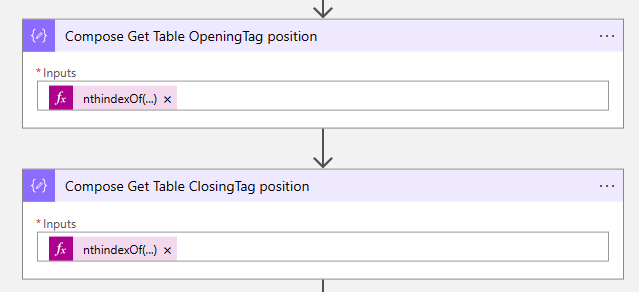
- You already know that the data is stored in the second table, so you want the Logic app to return that table via the table tag. You can use the following code:
nthindexOf(body('HTTP_Get_Windows_11_Release_Information'),'<table',2)- Now you also need to know the position of the closing tag of the table, create another compose action, and use the following code to get the end of the table.
nthindexOf(body('HTTP_Get_Windows_11_Release_Information'),'</table>',2)- Now you have the position of the opening and closing tag via the Compose Get Table OpeningTag position and Compose Get Table ClosingTag position, now you want to have the information between these tags.
- Create another compose action. And use the following expression:
substring(body('HTTP_Get_Windows_11_Release_Information'),outputs('Compose_Get_Table_OpeningTag_position'),sub(outputs('Compose_Get_Table_ClosingTag_position'),outputs('Compose_Get_Table_OpeningTag_position')))- After you run the Logic app, you will mention that the Compose Get Table Content is missing the table closing tag. So, type in the compose input field after the expression the following code:
</table>- The next step is to convert the table to XML and then to JSON. Create another compose action and add the following code:
json(xml(outputs('Compose_Get_Table_Content')))- After the Compose Convert to JSON via XML action, create a select action to get the needed information from the JSON.
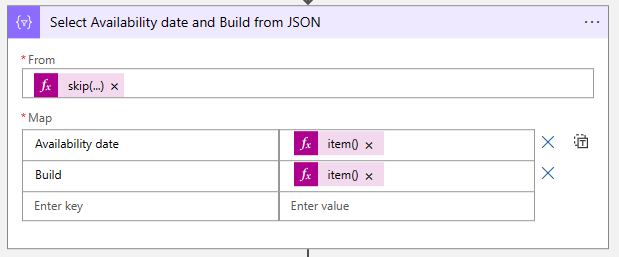
- In the Select Availability date and Build from JSON enter the following code to the from field:
skip(outputs('Compose_Convert_to_JSON_via_XML')?['table/tr'],1)Note. This code will get all the rows in the table and skip the first row because all the needed fields are empty. This has to do with how Microsoft formatted the table. No big deal.
- On the Map part of the select action create the following items
Availability date:
item()?['td']?[1]Build:
item()?['td']?[2]- The Select Availability date and Build from JSON action will return a JSON with only the Availability date and Build items.
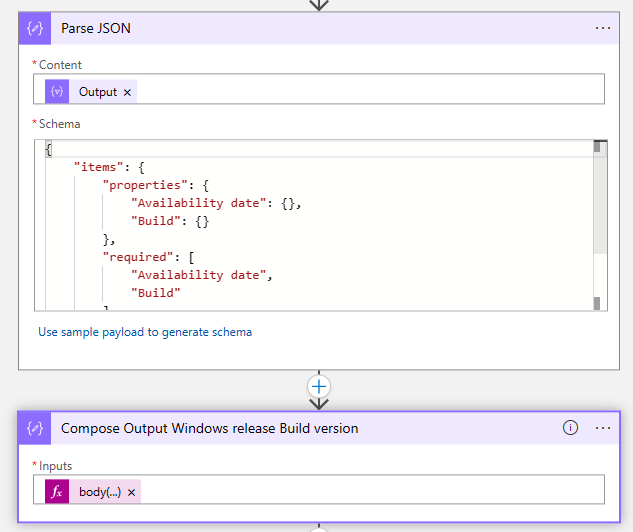
- Create a Parse JSON action.
- Configure the output of the select action as the content of the Parse JSON action and configure the following Schema:
{
    "items": {
        "properties": {
            "Availability date": {},
            "Build": {}
        },
        "required": [
            "Availability date",
            "Build"
        ],
        "type": "object"
    },
    "type": "array"
}- After the Parse JSON action, create another Compose action and enter the following code to get the build version:
body('Parse_JSON')?[variables('N')]?['Build']- The Compose Output Windows release Build version will return your supported version.
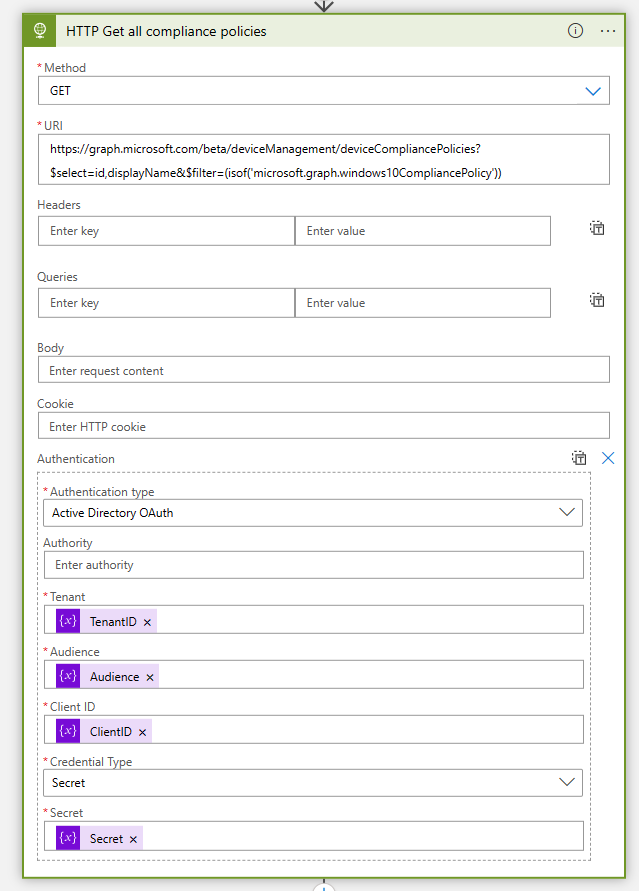
- The next action is to get all compliance policies via an HTTP action. Configure the below HTTP configuration:
URI:
https://graph.microsoft.com/beta/deviceManagement/deviceCompliancePolicies?$select=id,displayName&$filter=(isof('microsoft.graph.windows10CompliancePolicy'))| Method | GET |
| Authentication Type | Active Directory OAuth |
| Tenant | @{variables(‘TenantID’)} |
| Audience | @{variables(‘Audience’)} |
| Client ID | @{variables(‘ClientID’)} |
| Credential Type | Secret |
| Secret | @{variables(‘Secret’)} |
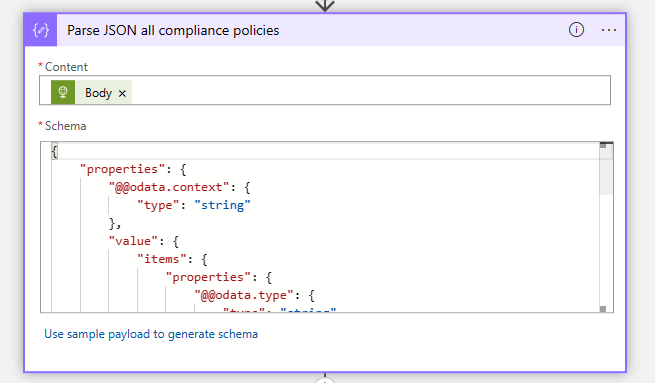
- After the HTTP Get all compliance policies create another Parse JSON action with the body of the HTTP Get all compliance policies action. Configure the following Schema:
{
    "properties": {
        "@@odata.context": {
            "type": "string"
        },
        "value": {
            "items": {
                "properties": {
                    "@@odata.type": {
                        "type": "string"
                    },
                    "displayName": {
                        "type": "string"
                    },
                    "id": {
                        "type": "string"
                    }
                },
                "required": [
                    "@@odata.type",
                    "id",
                    "displayName"
                ],
                "type": "object"
            },
            "type": "array"
        }
    },
    "type": "object"
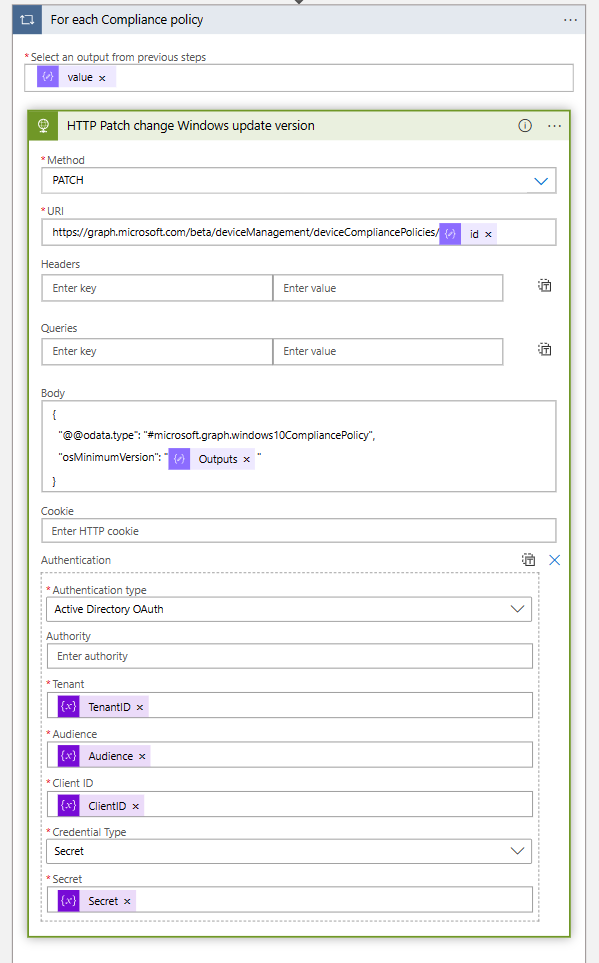
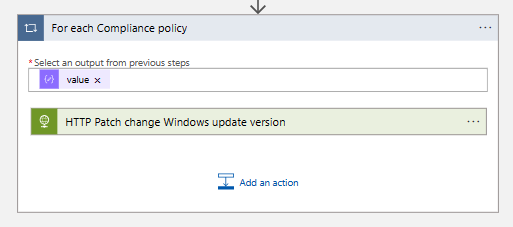
}- After the Parse JSON action, create a For each loop with the output of the Parse JSON all compliance policies action.
- In the For each loop, create an HTTP action to patch the Windows build version to all Windows compliance policies.
- Set the following configuration in the HTTP Patch change Windows update version action.
URI:
https://graph.microsoft.com/beta/deviceManagement/deviceCompliancePolicies/@{items('For_each_Compliance_policy')?['id']}Body:
{
  "@@odata.type": "#microsoft.graph.windows10CompliancePolicy",
  "osMinimumVersion": "@{outputs('Compose_Output_Windows_release_Build_version')}"
}| Method | PATCH |
| Authentication Type | Active Directory OAuth |
| Tenant | @{variables(‘TenantID’)} |
| Audience | @{variables(‘Audience’)} |
| Client ID | @{variables(‘ClientID’)} |
| Credential Type | Secret |
| Secret | @{variables(‘Secret’)} |
- The logic app is now ready to rumble. It will automatically update your compliance policy with your supported Windows build based on the Microsoft Documentation.







 Hi! My name is René Laas. I have passion and enthusiasm for the Microsoft 365 Cloud. I am based in the Netherlands.
 Gerd Altmann
Can you validate the input from the ms website? In other words; if the content creator decides to define the information in another way, doesn’t explode your code. It’s nice what you’ve done, but for as far as I can see, there not much input validation from the source..
Hi Maarten, no there is no validation, but when Microsoft decide to change the documentation the logic app will fail, if you setup monitor alerts it will give you an trigger to check the flow